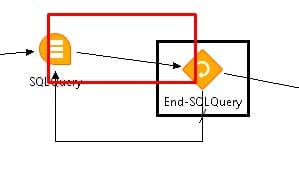
It is pretty common for a Lawson recurring job to error out and continually run for hours and days. This can build up in the waiting screen of the job scheduler (jobschd). To clean it up can be repetitive when it doesn’t have to be.

  1. Login to LID
  2. Go to the job scheduler by typing the jobschd command
  3. F7 >> A. to show all user jobs
    • In our example we have 7 jobs, but this method works for hundreds of jobs.
  4. On the top most job that you want to delete press the HOME key to “mark” the job. Notice the black arrow on the very left
  5. Now scroll down or even page down to the bottom most record >> Press the END key. Notice all jobs from the top to bottom have the black arrow on the left, indicating these are selected.
  6. Now press F9 (Delete) to remove these jobs. Press enter to confirm.
    • NOTE: if there are dozens or hundreds of jobs, you may need to hold Enter to continuosly delete them.

Hope this was helpful!

Amsterdam UMC recently chose to partner with tech giant Infor and system integrator Apex Systems (formerly known as Avaap) to deliver an enterprise resource planning (ERP) platform across the health network. Per the press release, Infor CloudSuiteTM Healthcare is a modern industry-specific cloud solution that is specifically designed for operational processes and integration needs of healthcare organizations. It can be used for the financial administration, procurement and logistics of the hospital. As one of the largest hospitals in Europe, Amsterdam UMC has over 16,000 employees providing care to 350,000 patients per year. The total implementation process will take about two years.


For Full Article, Click Here

LBI Smart Notifications are reports that are sent directly to users for reviewing vs a user logging into LBI to manually view a report. In this section we will first start off with an Intro to creating a Smart Notification. See Part 1 titled: “Creating an LBI Smart Notification Series – Creating an InfoSet (Part 1)


  1. Login into LBI (admin permission required) >> go to Tools >> Select Smart Notification
  2. In Smart Notification, select Notifications at the top
    • If you have none, it’ll say No Selections (see screenshot), else you’ll notice a list of existing Notifications
  3. To create a new Smart Note, click Add

  4. Smart Notification Wizard will pop-up and starts at step 1 (Select Facts)

    • The Facts section is where you would connect the dataset (or InfoSet) to the notification (this can also be a document among varios other types of data).
    • An InfoSet is most commonly an SQL query or stored Proc that gathers data from a database.
  5. For this example, we will assume you have an InfoSet already created. View your InfoSets by clicking Search

  6. For our example we will be selecting the MonlthyVariance InfoSet and then select Range
  7. At the bottom of the next page choose Select >> Add >> Ok at the very bottom

  8. At the bottom under My Selections you should now see your InfoSet for step 1
  9. Now click Next or select step 2 Conditions
    • Conditions can be added with the Add button. This lets you tailor the data to your liking. This can also be done on the InfoSet side when writing a query or stored proc.
  10. Click Next again or select step 3 Delivery
    • Delivery typically is done through the Device tab which are setup email addresses in Smart Notes (See article titled “How to setup a LBI smart note delivery device”)
    • The Bursting tab is the alternate method. In the Bursting tab select the InfoSet, and the column to burst on which is typically a list of email addresses.
    • Schedule tab is similar to Device, except on a schedule which can be set elsewhere for the Notification.
  11. Click Next again or select Step 4 Related Info
    • Related Info lets you link other LBI reports, shared documents, deploy in a pre-made formatted template among other customizations. This may be covered in more depth in a future article.
  12. Click Next again or select Step 5 Save
    • This is where you Name, describe, set Home Page Group for your Notification.
    • You can also Preview, set Status, and add additional Permissions if needed.
  13. Click Save New Item to create your new notification and view it in the Notifications Tab.


Hope this was helpful! Good luck!

One of the biggest goals in almost every business is to build strong connections with their customers. Luckily, customer relationship management (CRM) systems provide all the necessary tools to do just that. The best CRM software puts the customer first, so you can optimize your marketing and sales processes to drive conversions and boost revenue. With so many CRM tools provided, where do you even begin? Business and technology expert Paul Maplesden shares an article at Tech Radar providing helpful information that will improve customer interactions, optimize your processes, and increase your bottom line. Maplesden notes the right CRM technology platform will provide you with the framework, measurements, and tools you need to transform customer relationships.

  • Understand the importance of improving customer relationships
  • Realize that building better customer relationships is about optimizing customer-facing processes
  • Focus on improving one area of customer relationships at a time
  • Understand the specific CRM processes that fall into each improvement area
  • Use CRM metrics to create a baseline for customer relationship processes
  • Understand the user-led, data-driven changes that will most improve specific CRM processes
  • Make necessary changes and measure improvements
  • Continue to track CRM metrics so everything runs smoothly

Improving customer relationships is an ongoing job. Repeating these steps will continue to optimize customer relationships and lead the path to business success.


For Full Article, Click Here

LBI Smart Notifications are reports that are sent directly to users for reviewing vs a user logging into LBI to manually view a report. In this section we will first start off with an Intro to creating an Info Set.


  1. Login into LBI (admin permission required) >> go to Tools >> Select Smart Notification
  2. In Smart Notification, select Admin at the top >> Work with InfoSets
  3. Click Add to start creating an InfoSet
  4. InfoSet Wizard should start >> Select the type of Info Set you want
    • Our example will be a Relational Database (JDBC) stored procedure with a predefined Data Source
  5. Click Next or go to Step 2 Define Info Set
    • In this section you will be defining your data depending on what type you select.
    • This data can include defining column data, number/string format etc.
  6. Click Next or go to Step 3 Specify Links
    • This section allows you to add file or class links which is dependent on your organization’s needs and what the notification will be used for.
  7. Click Next or go to Step 4 Save InfoSet
    • In this section you can add a Name, Description, set a group name.
    • Also allows you to add additional access, filter certain content, even categorize or limit the InfoSet.
  8. Once done with Step 4, click Save As New at the bottom to finish your InfoSet


That’s it! Smart Notifications and InfoSets have a lot of customizability, most of which aren’t necessary to get it going.

See Part 2 of this series titled “Creating an LBI Smart Notification Series – Creating a Smart Notification (Part 2)” to find out how to add this InfoSet to a new Notification report. Good luck!

Foundation Building Materials (FBM), a leading building materials and construction products distribution company, has selected Infor CloudSuite Distribution as its technology platform for growth. Moving to Infor’s CloudSuite Distribution ERP (Enterprise Resource Planning) solution will allow Foundation Building Materials to automate certain business processes, simplify complexities across several acquired businesses, and enhance scalability with AWS (Amazon Web Services’). Per the press release, FBM will also gain access to an integrated suite of applications, such as Infor Pricing Science (designed to help distributors set competitive prices and find opportunities to increase profits), proof of delivery and intelligent document management — eliminating the need to manage multiple third-party solutions. FBM will also be able to scale its business, while deploying its people resources more efficiently.


For Full Article, Click Here

The default behavior of the shopping screen in RQC is to now allow users to select their Requesting Company.  To allow users to select the company, the rqc_config.xml file must be updated.  Navigate to LAWDIR/system and open the rqc_config.xml file in a text editor.  In the “client” section, update the setting “allow_company_select” to “true”.  Bounce the WebSphere application server for the change to take effect.


Healthcare and technology have been an attractive combination in the modern digital age. Virtual reality (VR) and augmented reality (AR) have been game changers. There’s also a new player in – mixed reality (MR). An interesting article on Channel Futures Channel Futures technology and media platform defines this new form of interactive tech is a mixture of virtual and augmented reality, creating a new way to interact with everything around us. Also known as ‘hybrid reality’ and ‘extended reality’, MR’s potential spans across every industry imaginable. In healthcare, MR can help simple and complex medical procedures become easier and safer.
The Channel Future’s article shares three ways mixed reality has the potential to revolutionize the healthcare industry.
  1. Instant diagnoses. “MR glasses are being built that can display images and information on top of a patient’s body and even perform instant analysis of a patient’s condition. The day is almost here when doctors wearing MR glasses will be able to look at a patient and instantly know not just a patient’s vitals, but what the most likely diagnoses are.”
  2. Medical training, mixed reality style. “By leveraging MR, medical students can operate on cadavers in an environment that replicates what it’s like to perform surgery on a live patient. With the implementation of half reality and half simulation, these mixed reality surgeries can respond to a student’s actions as if it were a real procedure. Students can now practice with realistic virtual procedures that don’t risk anyone’s life.”
  3. Enhanced surgery. “Surgeons can make use of mixed reality and carry out virtual procedures with more accuracy than ever. Mixed reality glasses or screens can project real-time information (such as blood pressure and heart rate), patient imaging and more. MR can even help doctors monitor vitals and changes in a patient’s condition better than they can with the naked eye. MR imaging also provides real-time 3D views of anatomy, giving surgeons more detail and helping them make better informed decisions during procedures.”


For Full Article, Click Here

This process is going to assume you already know how to build a Lawson CSV report of users to compare against. LSA Report Maintenance has these report options available for this.


  1. Login into your windows machine and open Powershell as an Administrator.
  2. Type in this command: Get-ADUser -Filter * -SearchBase “dc=domain,dc=local” | select Name,SID | Export-CSV
    1. dc=domain,dc=local will need to be updated to match your organizations.
    2. select Name,SID will extract the users Name in AD (typically First and Last Name) and their Security ID.
    3. Since we are doing this to compare against Lawson users (assuming you’re using SSOP), you want to also include the sAMAccountName, this is login name the users use to login into their windows machine.
    4. Export-CSV Requires a path after it including filename,
      • example: Export-CSV C:\ExportDirectory\ADUserList.csv
  3. For example, if you only wanted the Name and sAMAccountName use the command below:
    1. Get-ADUser -Filter * -SearchBase “dc=Yourdomain,dc=Yourlocal” | select Name,sAMAccountName | Export-CSV C:\ExportDirectory\ADUserList.csv
      • NOTE: If you type dc=domain,dc=local incorrectly, Powershell will list the allowed partition(s), see screenshot below.
  4. If you only want Name and SID use the command below:
    1. Get-ADUser -Filter * -SearchBase “dc=Yourdomain,dc=Yourlocal” | select Name,SID | Export-CSV C:\ExportDirectory\ADUserList.csv

You should now be able to acquire the CSV file in your C:\ExportDirectory\ that you outputted to.

Good luck!

The Cornell Peter and Stephanie Nolan School of Hotel Administration of New York has chosen to implement key Infor Hospitality applications, Infor HMS, Infor EzRMS, and Infor Sales & Catering to meet and exceed modern guest expectations. Per the press release, Infor HMS is a hotel property management system (PMS) built in the cloud that provides hospitality organizations with a reliable hub for operations, tools to create clarity around business data, and the ability to establish a solid foundation to consistently deliver a superior guest experience. Additionally, Infor EzRMS is a cloud-based hotel revenue management software solution that automatically calculates demand and revenue forecasts, while recommending appropriate selling strategies. Further, Infor Sales & Catering automates the entire event booking process—from initial inquiry to the final invoice.


For Full Article, Click Here