

Before we get started, you’ll need to have distribution groups setup already. See our article on how to do that if you haven’t. You’ll likely need higher privileged access to perform these tasks.
Assuming you already have distribution groups setup, follow the steps below.
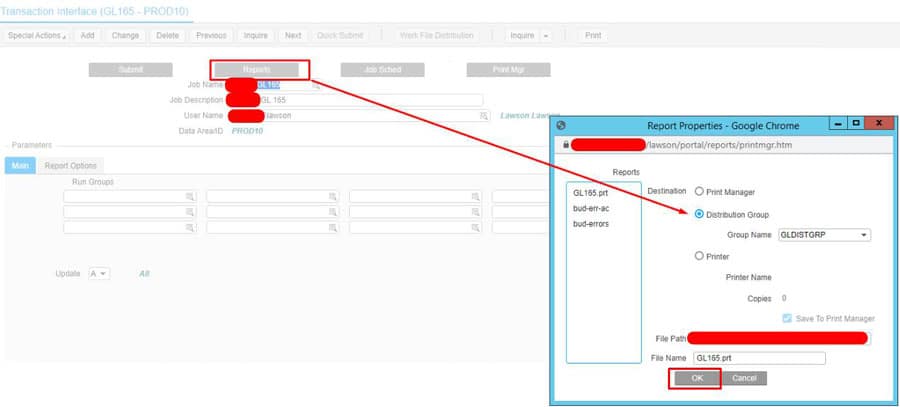
That is, your reports will now show up in the users print manager that are in the selected distribution group. All without having to go to LID.
If this task is crucial for your organization’s ongoing operations and requires expert organization and proactive management without the need for a full-time or on-site staff, Nogalis offers specialized consultant services. Our team of experts excels in maintaining and optimizing Lawson systems, providing proactive support tailored to your specific needs. Explore how Nogalis can improve your operational efficiency by contacting us through our dedicated contact page.
Clearing your browser cache is an important step after updating the Lawson Portal. This process ensures that your browser loads the most recent version of the website, preventing potential issues caused by outdated files. You can quickly access the cache clear dialogs in most Windows browsers using the shortcut Ctrl+Shift+Delete. Below are the steps for clearing the cache in various browsers. Note that these instructions are accurate as of the publication of this document. For the most up-to-date information, refer to your browser’s help system. For supported browsers, see the Infor Software – Compatibility Matrix for Infor Lawson Products.
Clearing the Browser Cache in Microsoft Edge
Clearing the Browser Cache in Google Chrome
Clearing the Browser Cache in Firefox
Clearing the Browser Cache in Safari
By following these steps, you can ensure that your browser is free of old, cached files, allowing the updated Lawson Portal to function correctly.

If you need to determine how long large jobs at your site take to run on average. You can use the calcjobs utility to gather information and to configure Batch Jobs Governor to take action when a job is taking longer to complete than expected.
The calcjobs can be used for viewing historical information about job execution time. You can run the calcjobs Perl script to show the duration of a single job, all jobs associated with a token, all jobs run on a date or within a date range.
Run the appropriate command depending on whether you want to show a single job, a token, a date or range of dates.
For tokens, the script output shows:
For jobs, the script output shows the same information as for tokens but for a single job.
For dates, the script output shows the same information as for tokens but for a single date or within a date range.
From a command window in LID, use the appropriate command in the sub steps that follow.
perl calcjobs.pl -t <token ID>
where <token ID> is the name of the job, for example, AP100.

For a job, specify:
perl calcjobs.pl -j <job ID>
where <job ID> is the name of the token for which you want to obtain history, for example, AP510-ALL.

For dates, specify:
perl calcjobs.pl -r <date>
where <date> is the single date for which you want to see historical data.
Or
perl calcjobs.pl -r <date> <date>
where <date> and <date> are the start and end dates for a date range.

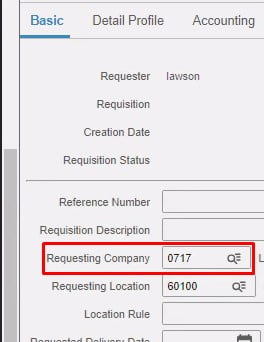
In lawson requisition center, you may encounter this issue where you’re not able to change the company when create a new requisition.
In order to fix this, go into your %LAWDIR%\system directory and find the rqc_config.xml
Find this setting and set it to true:
<setting id=”allow_company_select” value=”true”/>

Save your rqc_config.xml file
Login to Lawson portal and go to Bookmarks >> Requisition Center >> Select Utilities
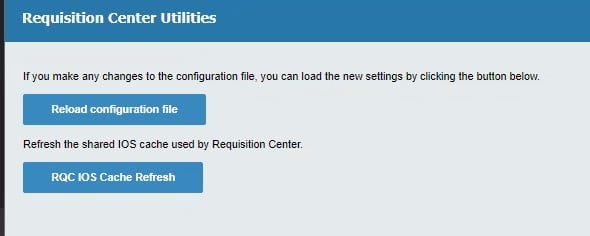
Click the Reload Configuration file
Click the RQC IOS Cache Refresh
Logout, clear your browser and depending on your server, the cache may take up to 15 minutes to clear.
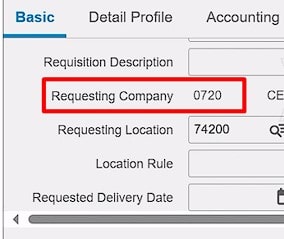
Now you should see a drillable company box:

When running a report, you may intermittently get this error: “Max processing time or Max records limit reached… Error code 0”
Screenshot of error:
![]()
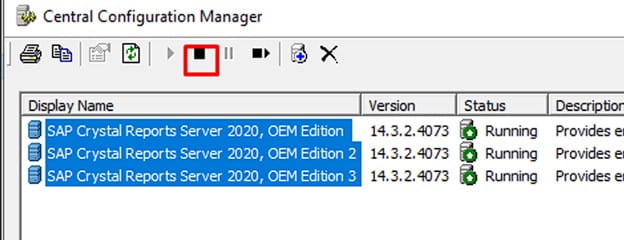
This one is an easy fix. Go to your LBI server, open Central Configuration Manager.
Highlight and stop all SAP Crystal Reports Server processes as shown below:
After waiting for the processes to stop, double click on each one, go to Parameters Tab, under Max Number of Records, select Unlimited (NOTE: in my screenshot below, I could not turn off process for this demonstration so it’s greyed out).
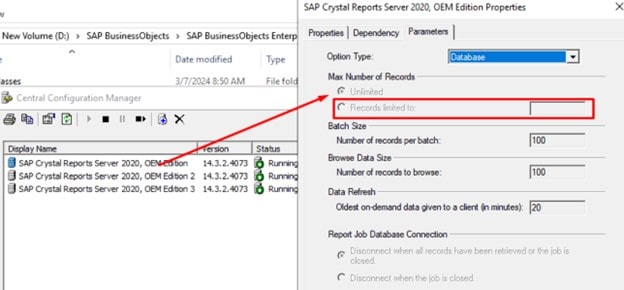
Once you update each of these processes (you may only have one or two), start the SAP Crystal Reports server processes again, then test the LBI report once more and make sure you’re generating enough report data that surpasses the previous record limit (usually greater than 10k records).
Good luck and hopefully this helped resolve your issue!

Ensuring your browser is correctly set up for compatibility with Infor OS Portal (or Infor Ming.le) is essential for a smooth user experience. Here’s a step-by-step guide to help you modify the browser compatibility view setting.
Step 1: Launch and Log In
First, open your web browser and navigate to the Infor OS Portal (or Infor Ming.le) website. Enter your credentials and log in to access your dashboard.
Step 2: Access My Settings
Once logged in, look at the toolbar on the top of the page. Click on your username, which should be located towards the top-right corner, and select “My Settings” from the dropdown menu. This will open the Personal Settings window.
Step 3: Edit Personal Settings
In the Personal Settings window, find and click on the “Edit Item” button. This action will open the Edit Personal Settings dialog window.
Step 4: Adjust Browser Compatibility Mode
Within the Edit Personal Settings dialog, locate the “Browser Compatibility Mode to Use” setting. Here, you will see a dropdown menu where you can select the value that matches the browser version you are using. Choose the appropriate option and click “Save” to apply the changes.
Step 5: Save and Close
After saving the changes, you will be returned to the Personal Settings page. To complete the process, click the “Close” button to exit the settings.
By following these steps, you can ensure that your browser is correctly configured for optimal performance with Infor OS Portal (or Infor Ming.le). This simple adjustment can help prevent compatibility issues and improve your overall user experience.

A user can on behalf of another user use a proxy to assign a task that the user would typically perform to another user so that the other user can take action for them. For example, Mary is going on vacation and will need someone to take actions in her absence. You can assign a proxy for that task. You could also assign a proxy permanently to one of a user’s tasks.
Proxied work items are routed to the Personal Task of the user who has been assigned as a proxy. A Personal Task is the task that all users have which is named with their username. User Josh Denver may have task named, depending on your site’s naming conventions, “jdenver”.
Users who had been given the required access rights can assign proxies for themselves. Infor Process Automation administrators can also assign proxies for users.

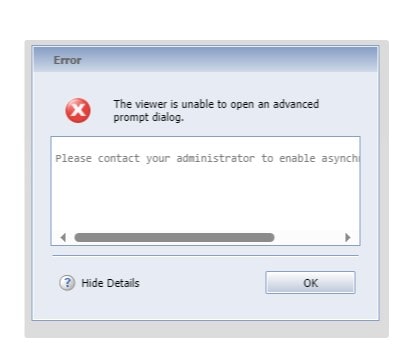
When on LBI (Lawson Business Intelligence), sometimes your users may receive the following error: “The viewer is unable to open an advanced prompt dialog” when they are trying to adjust the parameters on a crystal report running through LBI (see screenshot). To resolve this error, follow the steps below.
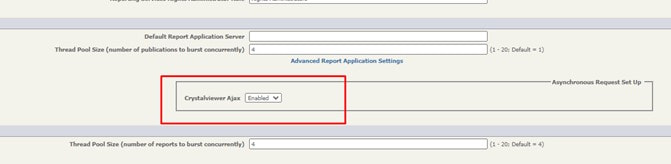
First, navigate to the ERS install validator at https://<lbi-server>:<lbi-port>/ers/installvalidator.jsp?
Next, log in as an administrator. On the System Settings, set “Crystalviewer Ajax” to “Enabled”.
Finally, save the install validator configuration. The changes are instantaneous, and do not require a restart. You should no longer receive the error!