

Problem
We need to make a change in TEST to AP10 custom form.
Next steps:
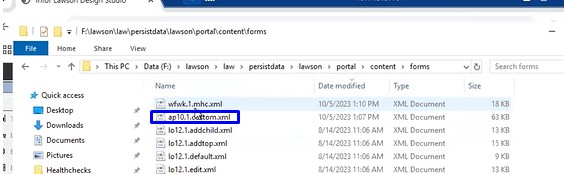
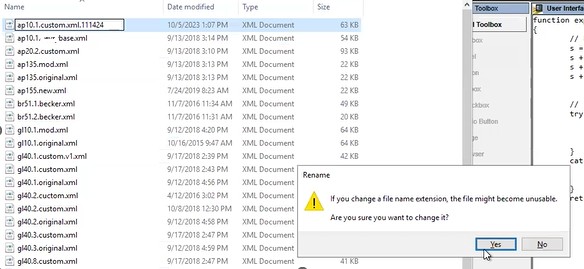
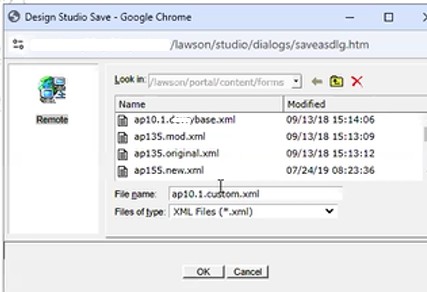
Backup the existing AP10 custom file and copy the new version, ap10.1.custom.xml file to Prod F:\lawson\law\persistdata\lawson\portal\content\forms
There is no impact to users and no outage required.
After the change is in place, AP10 users will need to clear their browser cache and cookies and an IOSCacheRefresh will need to be run to clear the DS from Portal.
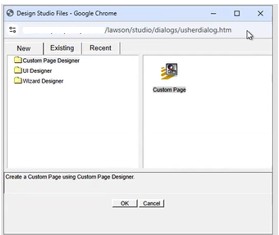

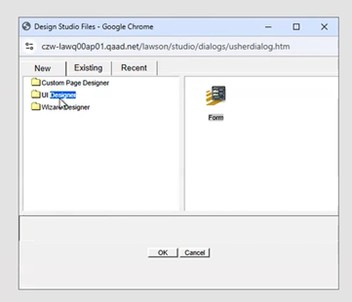
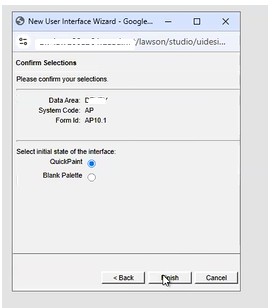


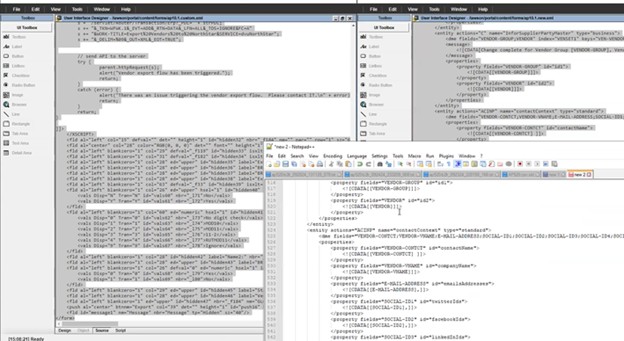
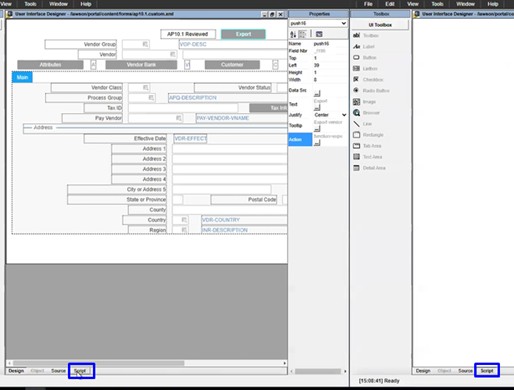
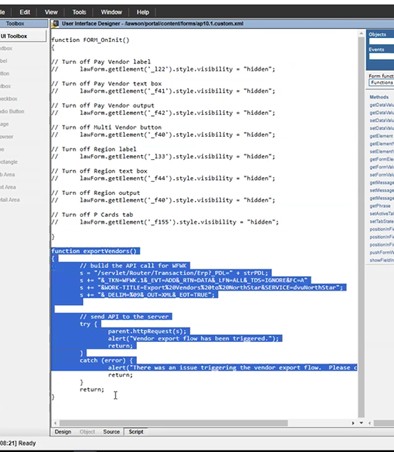
The ap10.1 reviewed is the customization

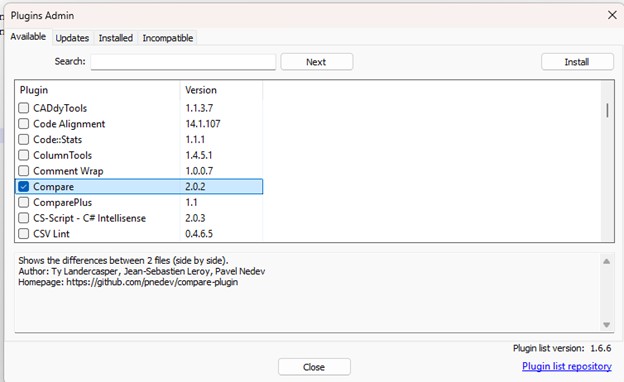
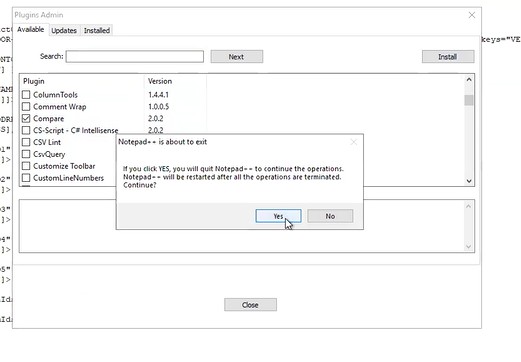
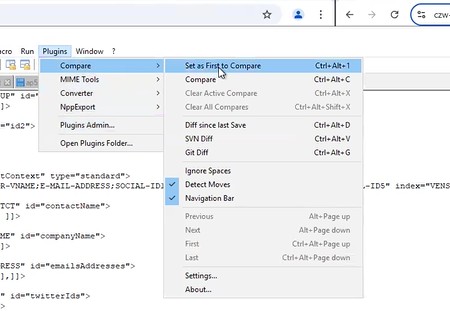
Look for compare and check it and click install
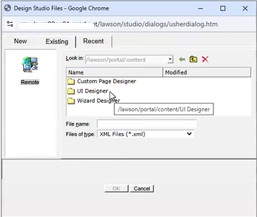
Then go back to plugins admin/compare and
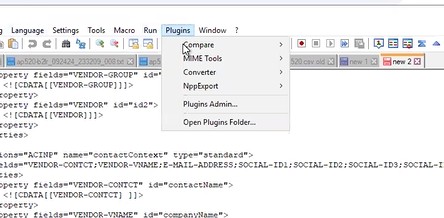
Compare/compare
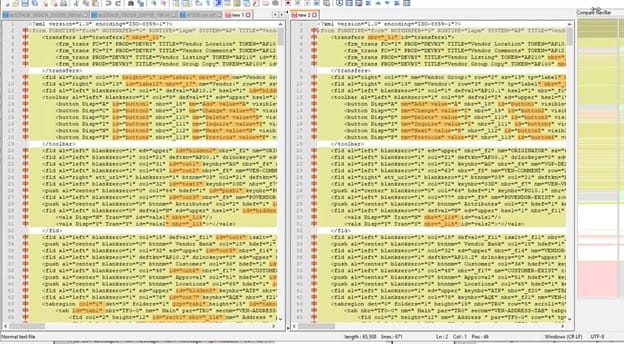
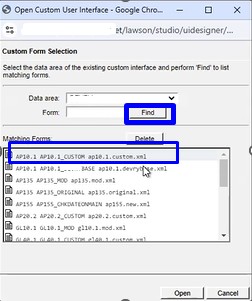
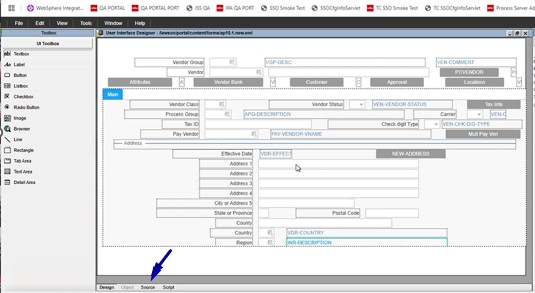
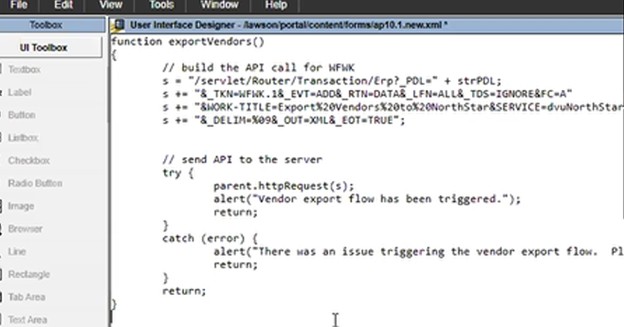
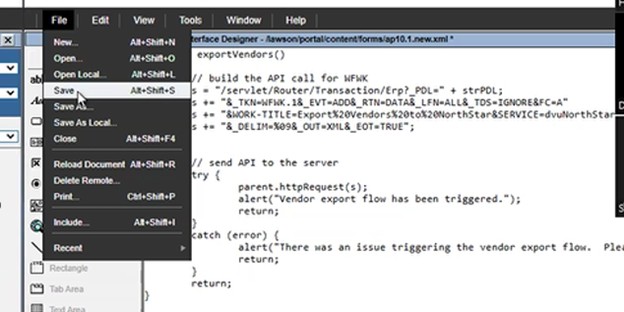
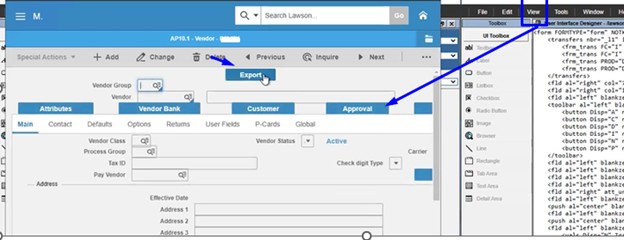
Just add the export button to a fresh form and overwrite the old one.
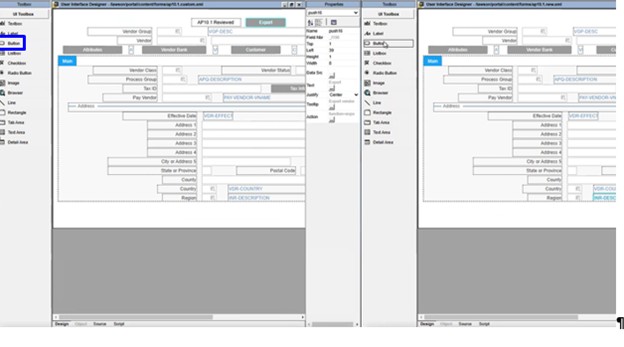

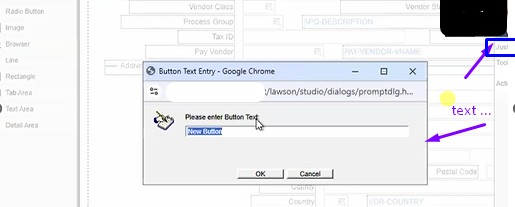
Type export 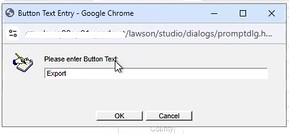
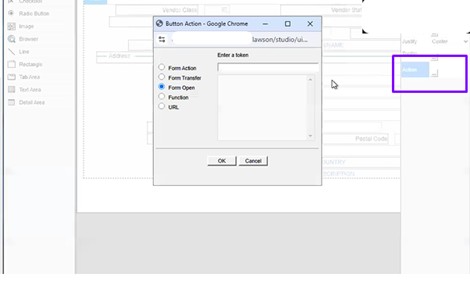
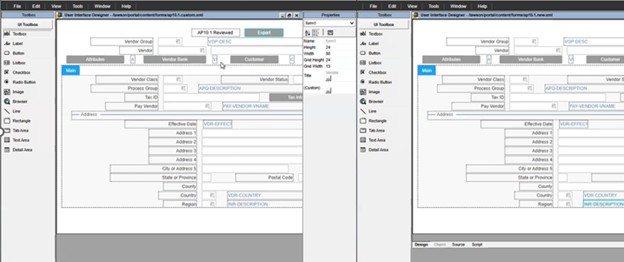
This tells you want you want it to do, so go to the other screen and copy what that one has
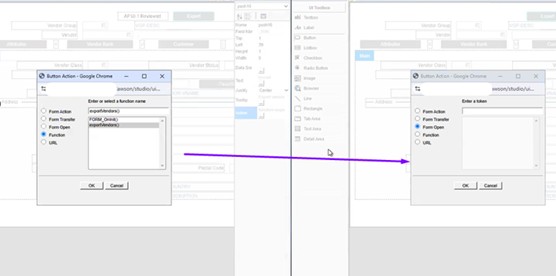

Since they have old code, we don’t need the other one

In Lawson v10, Admin users would have direct access to system logs but in the cloud, you’re access is limited to FTP access.
Problem: Reviewing IOS and LADB logs live is more difficult through FTP since you’re unable to download or view a file that is currently being written to. To get around this you simply use the copy line command or cp.
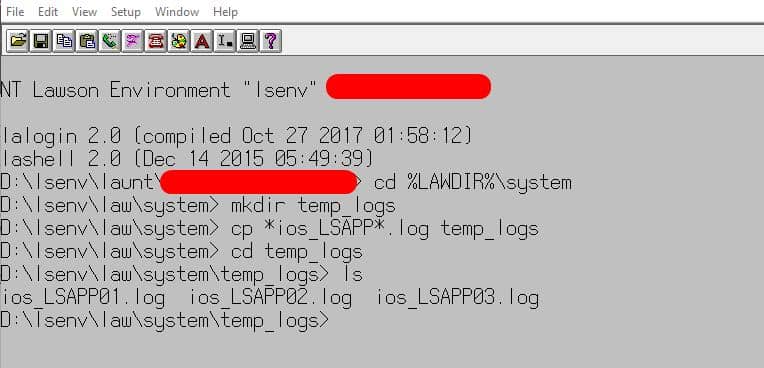
To understand this process, follow the steps below:
Step 1: Open LID and connect to the Lawson environment you want to access logs from.
Step 2: Go to %LAWDIR%\system directory
Step 3: Create a new folder in %LAWDIR%\system directory, command is: mkdir temp_logs (this will create a folder called temp_logs)
Step 4: In %LAWDIR%\system type this command (change based on your log names):
cp *ios_lsapp*.log temp_logs
Step 5: Go to %LAWDIR%\system\temp_logs and run the ls command to view your copied log files or simply download them from the FTP.
Here is a screenshot of my results:
If you found this article helpful, Nogalis offers expert technical resources for managing Lawson Cloud environments. Whether you’re dealing with FTP restrictions or need assistance with accessing logs, our team is here to provide guidance and support. Contact us to learn more about how we can assist with your Lawson system needs.

BSI Support has asked for a BSI Display Log. Use this method to configure your system to create the logs.
Open msgmnt and enter your Product Line and enter Category ‘PRTFX’.
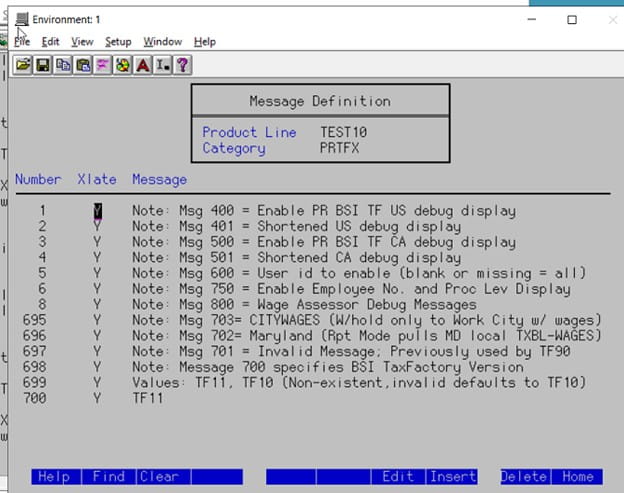
Look in the Number column to see if the Number 400 appears. If there is not a message 400, you will need to add it.
You can either Tab or Down Arrow to get to a position to enter the 400 line.
Use the F8 key to Insert a line.
Type 400 in the Number column.
Type Y in the Xlate column.
Within the Message portion, type in the fix for the message
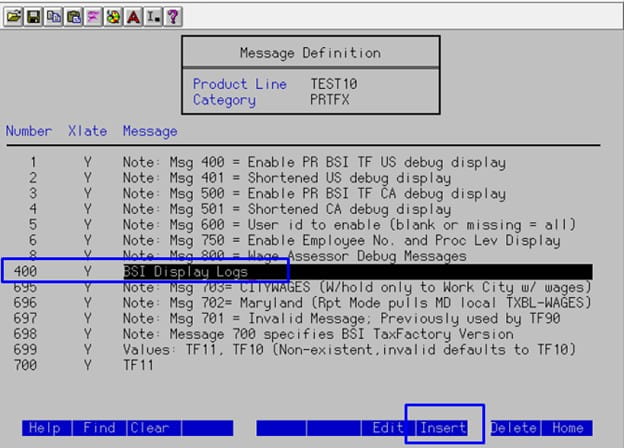
After pressing Enter twice, the 400 message will appear in the appropriate order and has been added to the listing.
Now go to PR80, create a payment and Calculate
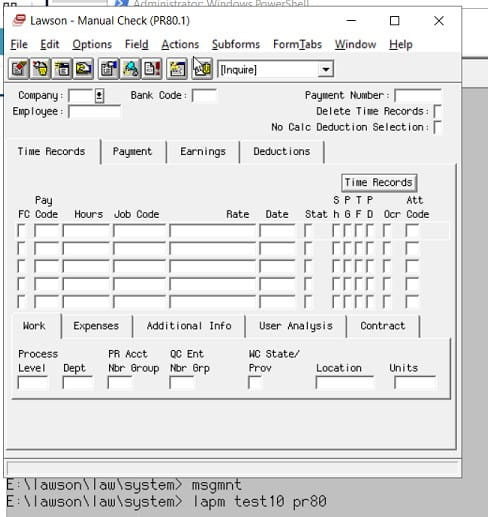
After the PR80 has been successfully calculated, click on Options > Display Log File
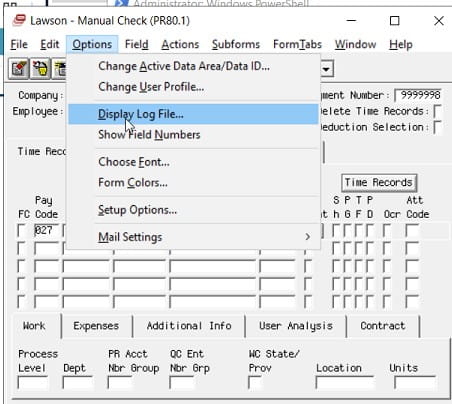
The Display Log will appears in a new text editor. Save the file as ‘BSIDisplayLog’ and send the file to BSI.
A common ED501 message is “WARNING: SUBSTITUTION TABLE ENTRY NOT FOUND”. This substitution table is maintained in screen ED40.1, and if the key values passed to ED501 are missing, you will receive this error. Simply update your ED40.1 and recover the job.
If this message causes your job to go into recovery, that is because you have not set up notifications for EDI. Here is a simple solution to troubleshoot this message: If you set up notifications, then this message will cause an email to be sent about the warning, but the job will continue to process the remaining files. Notifications are configured on ED00.1, as well as the configuration file located in the EDI directory.

Every time an employee makes a benefits change, a new record is stored in the benefits table. Additionally, a new record is stored in the employee’s deduction master table for each deduction related to that benefit. If these records are allowed to accumulate unchecked, this can slow down payroll processing and even cause errors. The larger the benefits and deductions table become, the slower payroll batch jobs will run. These batch jobs, such as PR140, loop through each record in these benefits and deductions tables so that the correct deductions are applied. Some of these batch jobs have a limit of the number of records allowed, so if an employee has deductions that exceed that limit, the job will error out. Also, traversing through these records can greatly slow down processing.
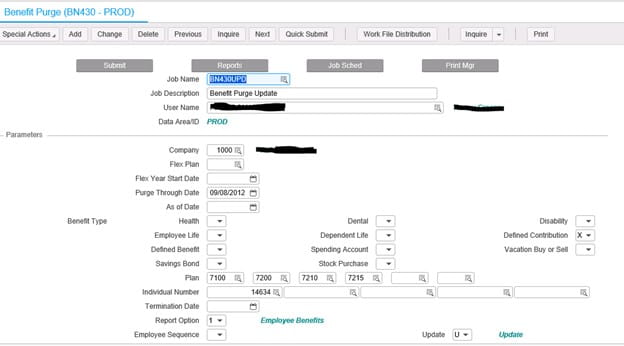
To help alleviate these issues, we recommend running the BN430 benefits purge program periodically. When you are processing payroll, if you see an error similar to “26 20591 PRDED-DED-TABLE must be increased; Cur size 0500”, chances are you have an employee with too many benefits changes, and need to run the BN430. But, before you receive this error, you should make the benefits purge part of a normal maintenance process. Ideally, payroll users would make this part of the payroll process each pay period, and choose a “Purge Through Date” corresponding to your company’s record retention period.

Problem:
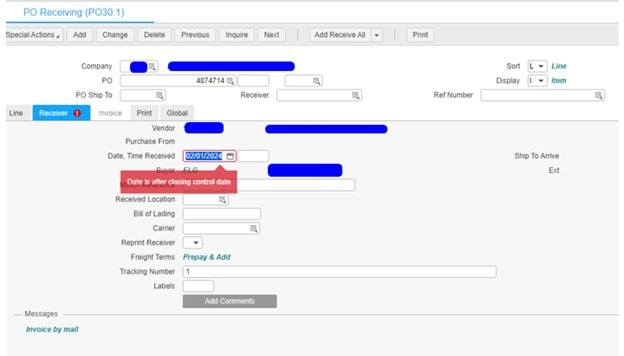
User is getting the error “Date is after/before closing control date” when trying to release PO’s.
Solution:
This message indicates that the transaction post date on the record you are working with falls outside of the date range allowed by the System Control Closing Control Valid Entry Dates (GL01). You will need to review this record to obtain the Valid Entry Dates and then correct the transaction post Date on the record to fall inside this range.
The GL01 Valid Entry Dates can be changed, but this record is used to ensure that transactions are created for a certain period, or range of periods only. You should work with your accounting staff if you feel the dates are incorrect.


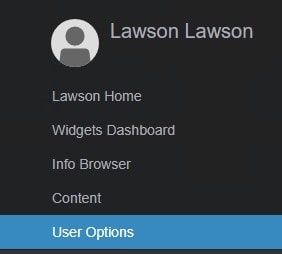
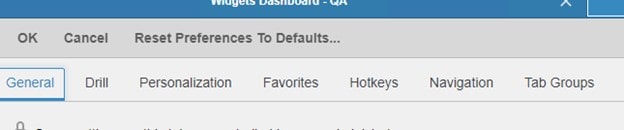
This guide explains how to modify settings for Lawson Portal options, affecting how applications display on your computer.
| Option | Meaning |
| Locale | The language that Lawson Portal uses. Default is U.S. English. Note: After changing the Locale, you must refresh the page for the change to take effect. Note: This option is not available to privileged online-only users. |
| Data Area | A defined storage place within a Lawson product line. A product line can have one or more data areas, allowing you to separate access to different sets of data within the product line. If you have more than one and are unsure which to select, consult your system administrator. Note: After changing the Data Area, you must refresh the page for the change to take effect. |
| Value Separator | Defines the character used to separate values in CSV files. The options are comma, tab, or semicolon. |
| Default Report Type | Select the default report format for Lawson system reports. Options include Text, PDF, and LSR. Note: For correct rendering of all data, only the LSR output format is enabled on the Arabic platform. See: Enabling Infor Lawson Smart Reports (Optional) in Lawson Administration: Jobs and Reports. |
| Default Printer | The default printer for Lawson system reports. Available printer names and locations are created by your system administrator. The selected printer name will be shown on the right of the drop-down list. Note: This option is not available to privileged online-only users. |
| Tab Recovery | Controls how tabs from your previous session are recovered: Ask (default): Lawson will prompt you to recover or start fresh when the system loads. Always: Automatically recover tabs from the last session. Never: Always start fresh without recovering tabs. Note: Tab Recovery saves the last session per browser, but data from the session is not saved. |
| Show Product Line in Page Header | Displays the current product line after the tab title. This option is disabled by default. |
| Auto Select Required Fields | Automatically prompts available data when processing a record. |
| Display Field Help | Shows help for a field when it is in focus. Useful for new users unfamiliar with the applications. |
| Allow Logging to Console | Logs browser console information related to Lawson Portal requests, including context messages and workstation state. |
| Use Data Entry Field Advance | Automatically moves the cursor to the next field without needing to click or press Tab. Note: Form customizations can affect the behavior. For example, if fields have been reordered in Design Studio, Lawson follows the original order when moving to the next field. Lawson Portal advances the cursor based on field type: Text and non-decimal numeric fields: Cursor advances when the maximum number of characters is reached. Signed fields: For decimal signed fields, the cursor moves when the maximum number of decimal places is entered. |
| Advance on 6-Digit Date Entry | Indicates that a date entry is complete after typing six digits (e.g., “093024” for 09/30/2024). This option is only available if Use Data Entry Field Advance is enabled. |
| Enable Accessibility Behaviors | Enables various usability features designed for assistive technologies. |
| Use Client Machine Time Zone | When enabled, Lawson Portal uses the time zone of the client machine when submitting jobs and displaying timestamps in Print Manager and Job Schedule. |
| Frequent and Recent Forms | Enables the use of frequent and recent forms on the Lawson Portal homepage and navigation menu. Click Clear data to reset the data. |
| Default Token View | Selects the default view for applications: Form View: Full field layout, requiring a key field search for data display. Ideal for frequent data entry. List View: Displays application records in a list. You can apply filters, create custom views, and select records for inquiry. List Mode: A wizard-based mode that guides you through required fields to locate and display records. |
| List View | Configure settings for List View: Number of Records: Maximum number of records displayed in List View. Maximum List View Edits: Maximum records that can be edited in a single transaction. Note: This option is not available to users without edit permissions. You can also exclude forms from List View by entering form tokens, separated by a semicolon. |
| List Mode | Sets the maximum number of records displayed in List Mode. |
| Highlight Key and Required Fields | Highlights required or key fields with a color swatch, matching the user’s accent color. |
| Shrink Forms to Fit on Screen | Shrinks forms to fit the screen without scrolling. Supported on Chrome, Firefox, Safari, and Microsoft Edge browsers. |