When the ADFS Token-Signing certificate is updated on the ADFS server, it will have to be imported to Lawson and Infor OS. The networking team should let the Lawson team know when the certificate is being updated in ADFS.
Someone with admin rights on the ADFS instance will need to export the certificate and provide you with the “.cer” file before these tasks can be completed.
Update the Certificate in Lawson
Log onto the Lawson Server
Start a ssoconfig -c session
Go to “Manage WS Federation Settings” > “Manage Certificates”
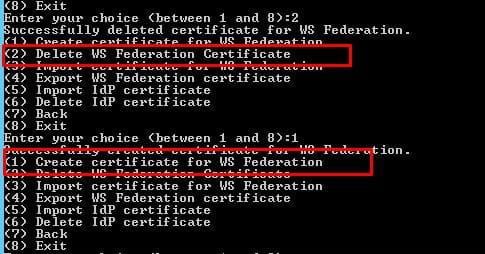
Select “Delete WS Federation Certificate”
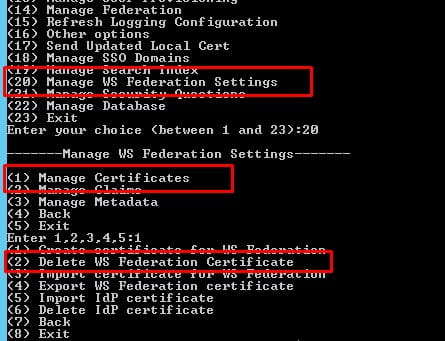
Select “Create certificate for “WS Federation”
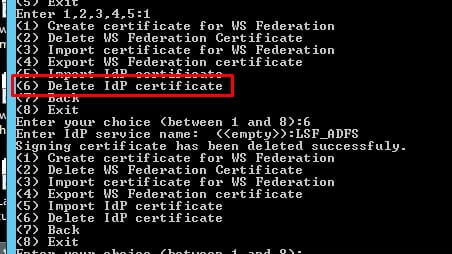
Select “Delete IdP certificate”
Enter the service name of your ADFS service (if you are unsure, export all the services and look for the one that redirects to your ADFS server).
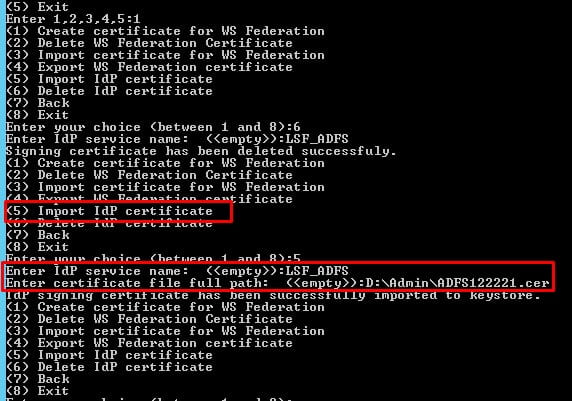
Select “Import IdP Certificate”
Enter the service name of your ADFS service
Provide the full path where you have the token-signing certificate saved
Reboot the server
Update the Certificate in Infor OS
Log into the Infor OS server as the LAWSON user
Log into the InforOSManager (should be an icon on the desktop)
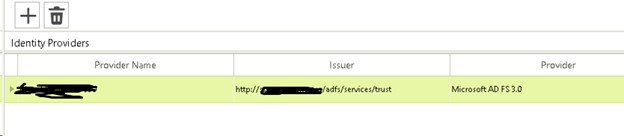
Go to Identity providers on the left side
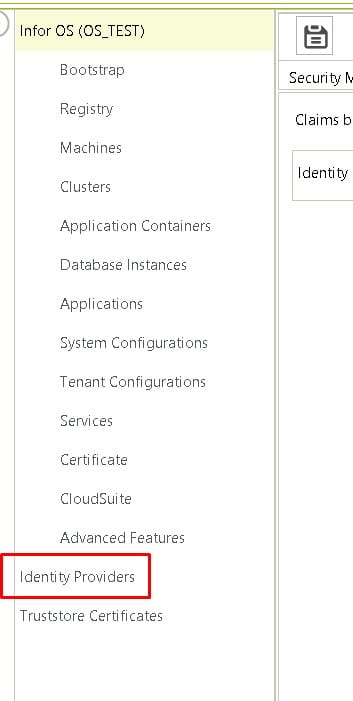
Double-click on your IdP
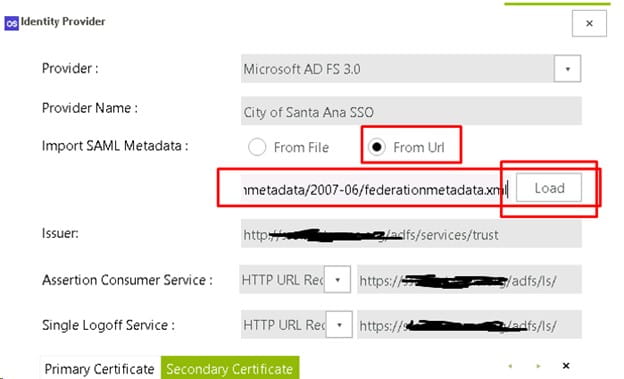
Select “From URL” to import the new certificate and metadata
Provide the URL: https://<your adfs server>/federationmetadata/2007-06/federationmetadata.xml
Click “Load”
Make sure the certificates load (there may only be one, but there should be at least one)
Reboot the server