Download the TaxLocator bulletin from mybsiconnect
Log into mybsi
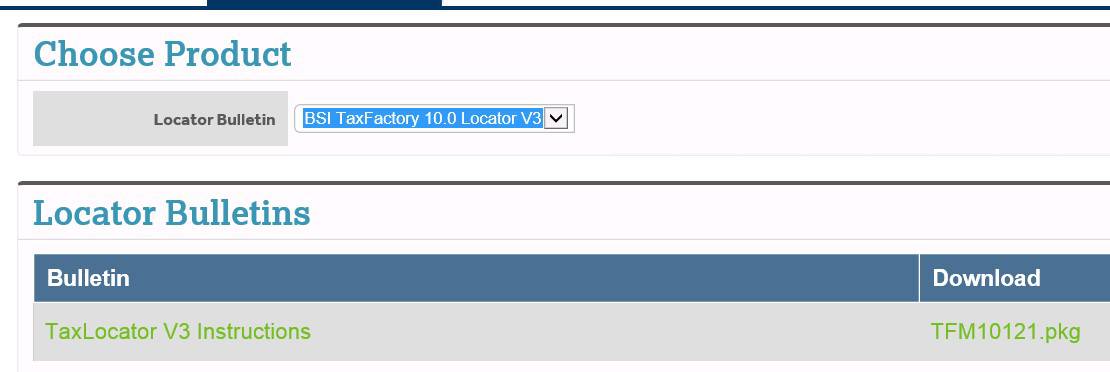
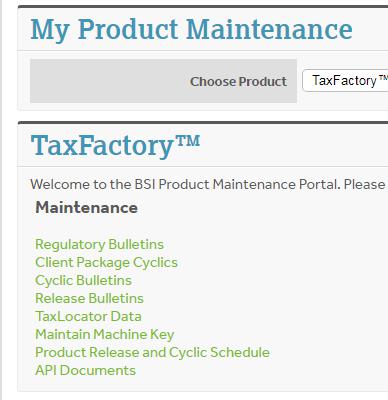
Choose product
Select TaxLocator Data
Select the appropriate Locator Bulletin
Download the pkg file
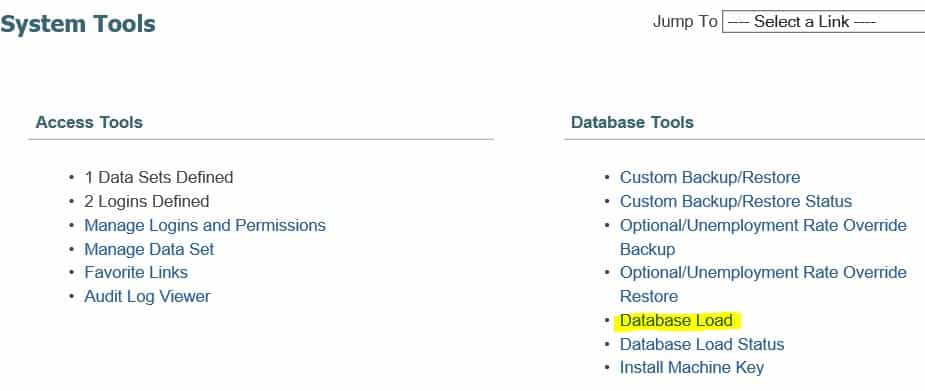
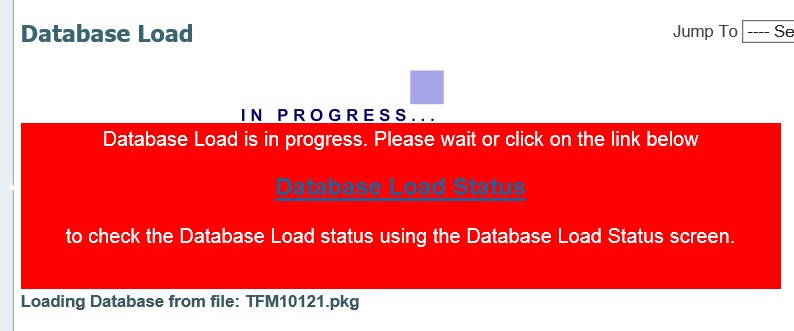
Log into your company’s BSI TaxFactory URL
Go to System Tools > Database Load
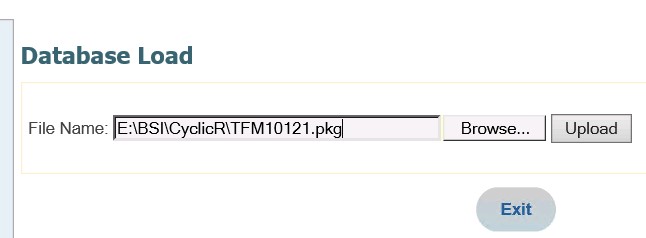
Browse to the pkg file you downloaded
Click Upload
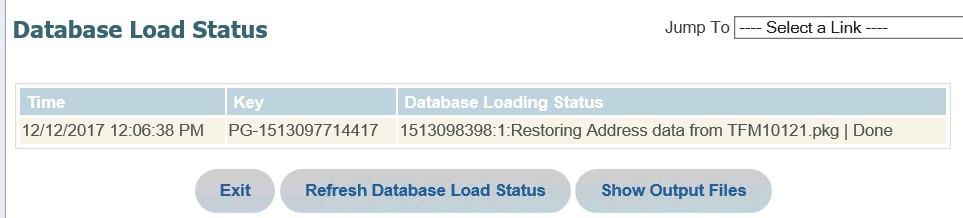
Select load all files
Click Process
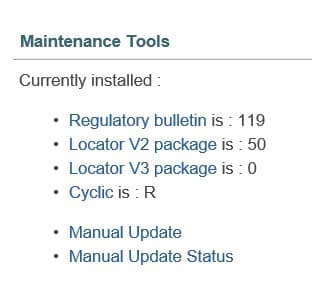
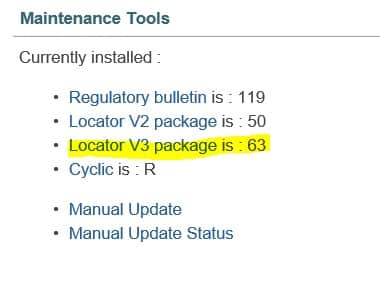
New locator package is updated
BEFORE
AFTER
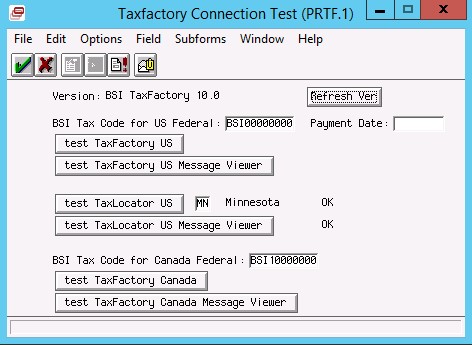
Validate the TaxLocator in Lawson
Log into LID
Navigate to lapm <PDL> prtf
Click the TaxLocator buttons
https://www.nogalis.com/wp-content/uploads/2018/01/How-to-update-your-TaxLocator-version-for-BSI-TaxFactory-10-e1515470970666.jpg545594Angeli Mentahttps://www.nogalis.com/wp-content/uploads/2013/04/logo-with-slogan-good.pngAngeli Menta2018-01-09 08:39:182019-05-20 13:21:37How to update your TaxLocator version for BSI TaxFactory 10
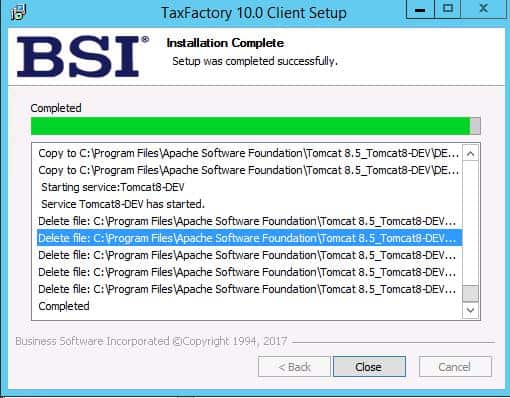
From the Cyclic bulletins screen, select the appropriate server download for your server configuration
Download the Cyclic Data File.
From the Cyclic bulletins screen, click Cyclic Data File
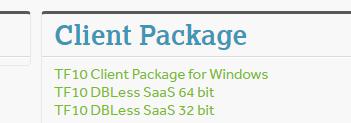
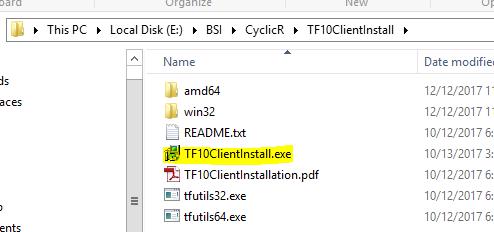
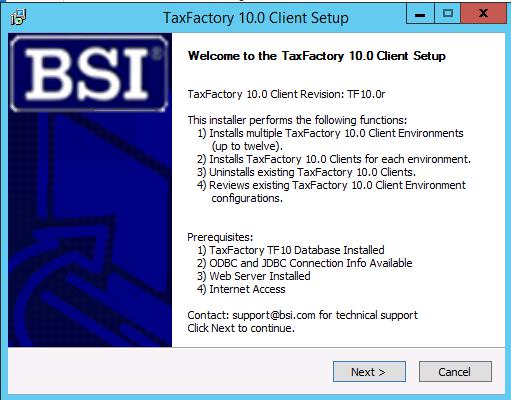
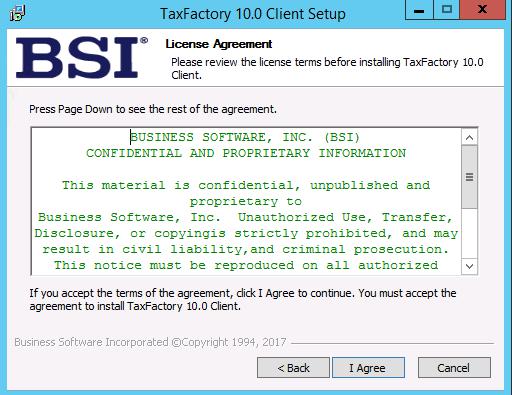
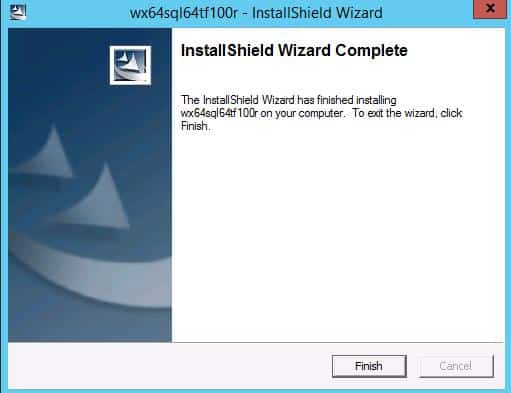
Uncompress/Unzip the client software.
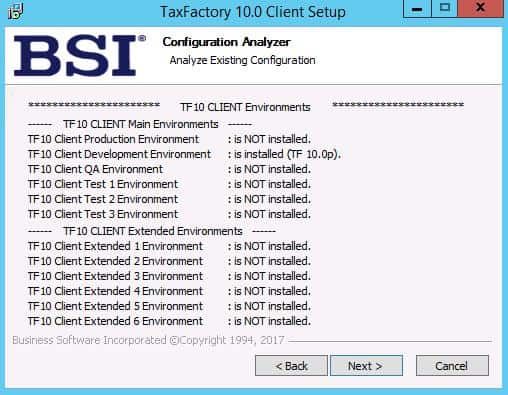
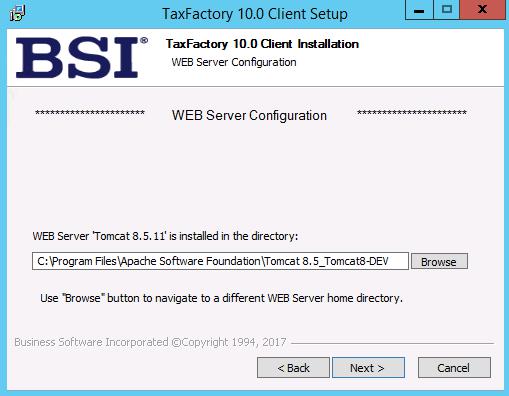
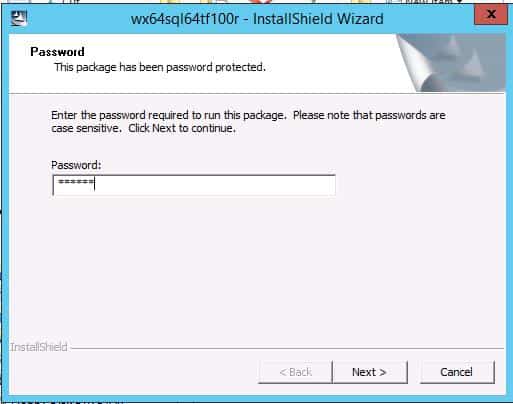
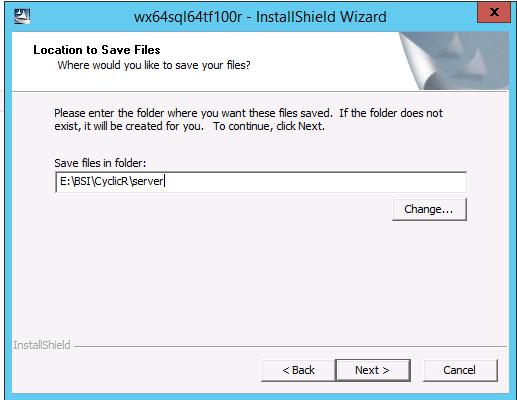
Install the client software.
Password can be fund under the Bulletin Information link
Skip any environments that are not installed
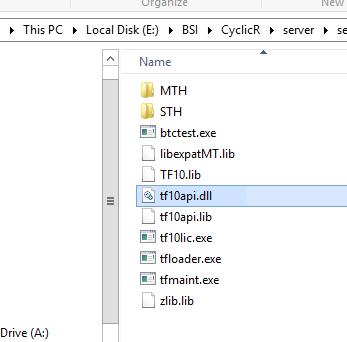
Uncompress/Unzip the server software.
Password can be fund under the Bulletin Information link
Transfer/move/copy the server software to your payroll system location. (on Windows this location is C:/Windows/System32)
Apply the Cyclic Data.
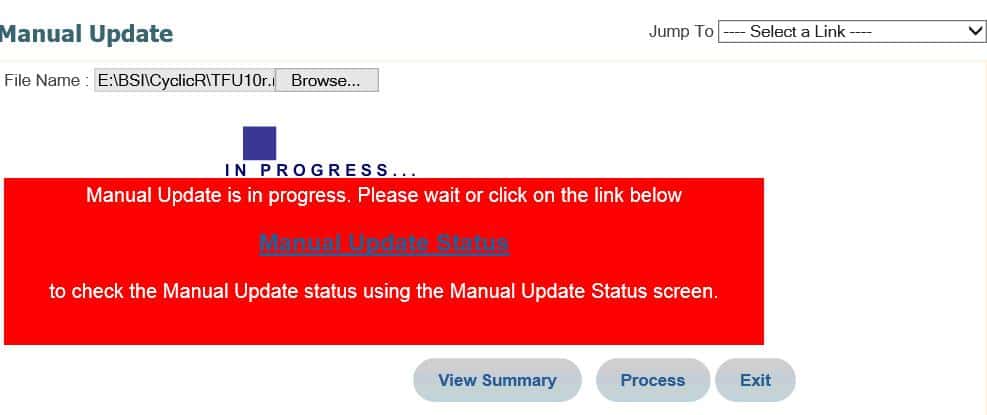
Log into the new cyclic URL (eTF10x, where x is the new bulletin letter)
Select your dataset
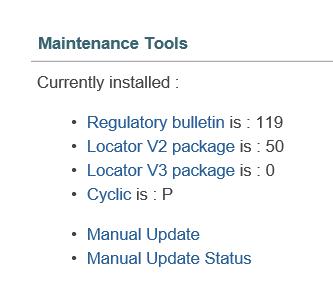
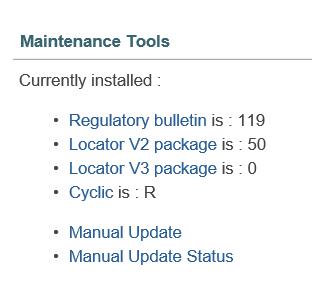
Go to System Tools
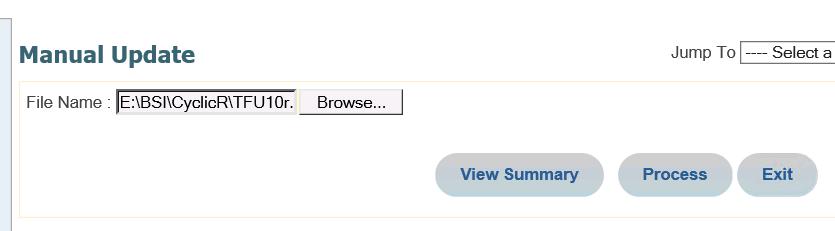
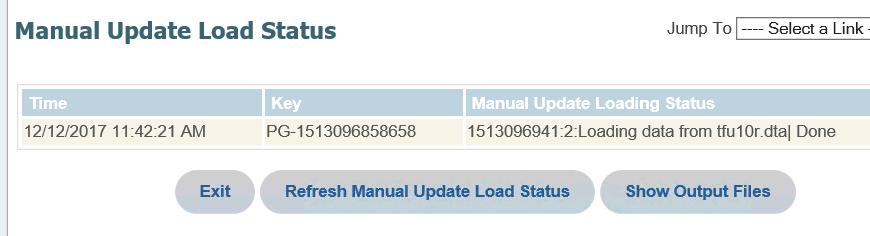
Under Maintenance Tools, select Manual Update
Browse for the data package you downloaded earlier
Click Process
Cyclic bulletin is updated
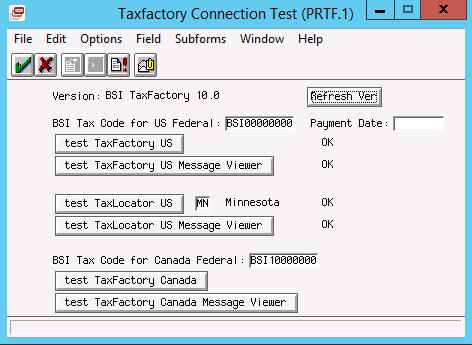
Verify BSI in Lawson
Log into LID
Navigate to lapm <pdl> prtf
Click Refresh Ver
Click the appropriate test buttons
https://www.nogalis.com/wp-content/uploads/2018/01/How-to-perform-a-cyclic-update-for-BSI-TaxFactory-10.jpg665732Angeli Mentahttps://www.nogalis.com/wp-content/uploads/2013/04/logo-with-slogan-good.pngAngeli Menta2018-01-02 08:44:382019-05-20 13:22:38How to perform a cyclic update for BSI TaxFactory 10
Executable Command . . .: D:\COBOL\bin64\run.exe D:\lsfprod\law\prod\obj\CU201.gnt prod NT00000002 C 1 Process ID . . . . . . .: 11996
Running as Account . . .: \lawson
Program Messages:
Load error : file ‘lacobrts.dll’
error code: 173, pc=0, call=1, seg=0
173 Called program file not found in drive/directory
Elapsed Time . . . . . .: 00:00:00
ERROR: Stopped On Exit 32. Elapsed Time: 00:00:01
END: Job Ended: Wed Dec 6 11:30:02 2017
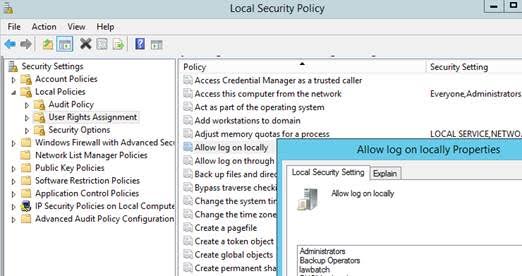
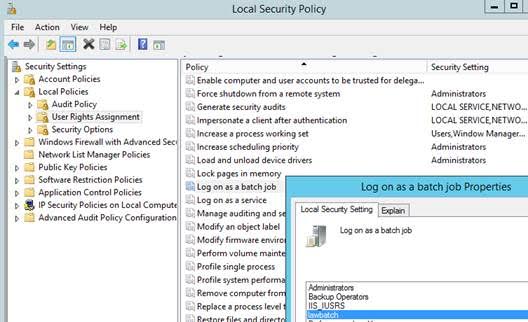
The error message from the job log indicated a problem with lacobrts.dll. The actual problem was related to the local security policy. This error was resolved by reviewing the setup for the lawbatch id. The LSF system in this example had a secured ldapbind. The domain lawbatch id should be added to the Local Security Policy under User Rights Assignment for “Log on as a batch job” and “Allow log on locally.”
If you are upgrading MSCM and need to test against production data, you may want to have multiple testing passes. This article will help you to refresh your MSCM database, even if the versions differ. (The MSCM install procedure updates the database for you when an older version is found).
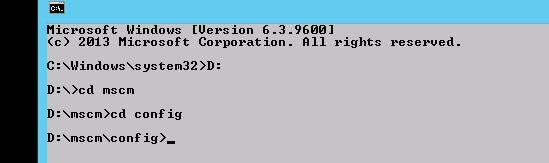
Uninstall MSCM
Log into the server as Lawson (or as the install user)
Open a command prompt as administrator
Navigate to <installdir>/config
Run the following commands
uninstallmscm
undeploymscm
Verify services as prompted
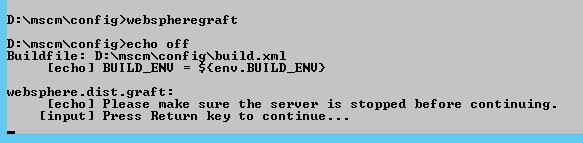
Verify that the MSCM application has been removed from WebSphere
Restore Database
Overwrite the destination database with the desired data set
Re-install MSCM
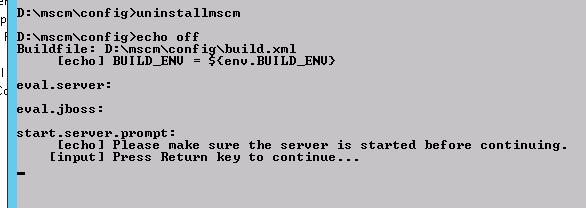
Log into the server as Lawson (or as the install user)
Open a command prompt as administrator
Navigate to <installdir>/config
Run the following commands
webspheregraft
installschedulertableprefix
installmscm
deploy
Verify services as prompted
Start the mscm application in WebSphere
https://www.nogalis.com/wp-content/uploads/2017/12/MSCM-Data-Migration.jpg545600Angeli Mentahttps://www.nogalis.com/wp-content/uploads/2013/04/logo-with-slogan-good.pngAngeli Menta2017-12-15 08:17:022019-05-21 15:53:13MSCM Data Migration
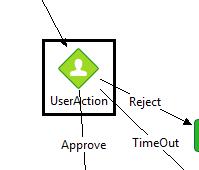
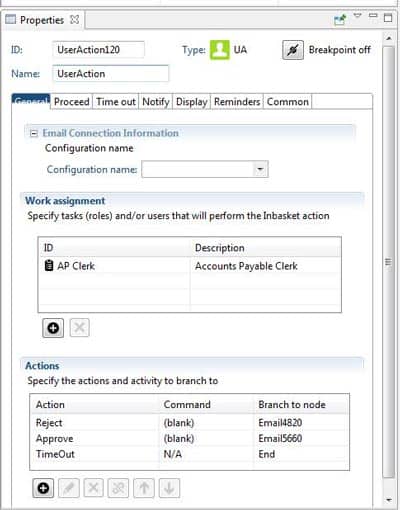
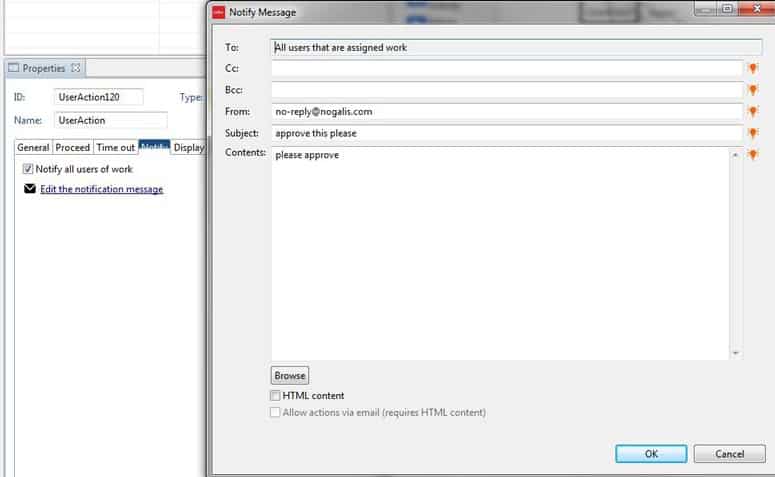
The User Action Node is typically used for Approval Flows. It is uses with the IPA inbasket to allow users to take action on items as part of an automated process.
Select the task associated with the user action (this must be configured in IPA Rich Client prior to creating your user action node).
Configure actions associated with this task (such as “Approve” or “Reject”)
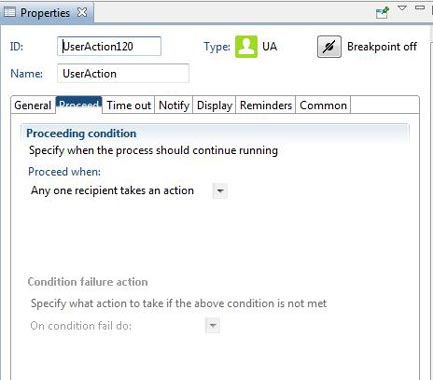
Decide when the action should proceed
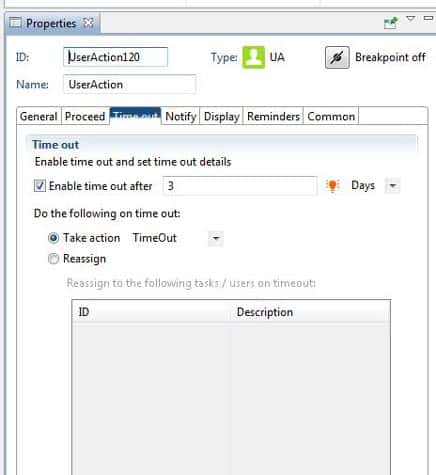
Configure the timeout settings
Configure the notification settings
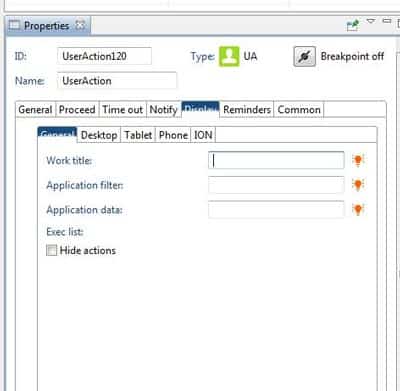
Configure the displays for various platforms
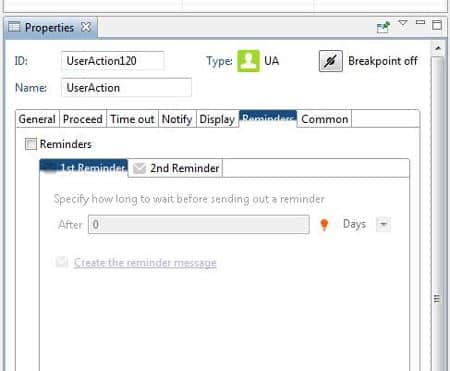
Decide if/how reminders will be handled
https://www.nogalis.com/wp-content/uploads/2017/12/IP-Designer-Series-User-Action-Node.jpg665732Angeli Mentahttps://www.nogalis.com/wp-content/uploads/2013/04/logo-with-slogan-good.pngAngeli Menta2017-12-11 08:42:182019-05-21 15:54:30IP Designer Series – User Action Node
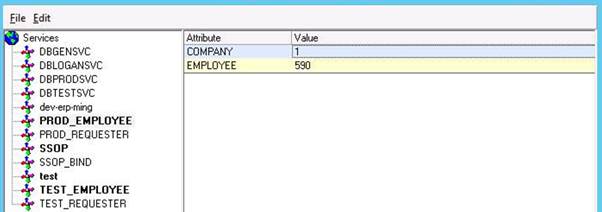
We just added a new productline to our environment. When I go into Employee Self-Service, I get an error message saying, “Error retrieving user profile information. Contact your system administrator for assistance.” How can we correct this?
This can happen when the services for the productline were not added to the system. The service can be added by going to %GENDIR%\install\agents. For example, D:\lawprod\gen\install\agents. The directory contains a number of xml files used for different services. In this case, copy the EMPLOYEE.xml file to PROD_Employee.xml. Edit the file and include the productline in the id attribute. Once the file has been changed, save it and load it into ssoconfig using:
ssoconfig -l password PROD_Employee.xml
After the file has been loaded, the new service should appear in security administrator.
You can then add the appropriate company and employee number for the user that was getting the error.
https://www.nogalis.com/wp-content/uploads/2017/11/Missing-Service.jpg665732Angeli Mentahttps://www.nogalis.com/wp-content/uploads/2013/04/logo-with-slogan-good.pngAngeli Menta2017-11-29 07:44:212019-05-21 15:55:20Missing Service
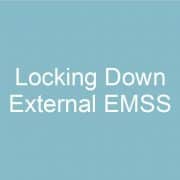
Many of our clients would like to lock down their external websites to EMSS only, because it is a security risk to allow super users to access HR & Financials from the web. The official word is that this cannot be done in Lawson. However, Nogalis has devised a method to remove the search box and all but the desired bookmarks from the external Lawson website. (See a sample below.) If you would like to have this done at your organization, please contact us today!
Internal Lawson Site
External Lawson Site
https://www.nogalis.com/wp-content/uploads/2017/11/Locking-Down-External-EMSS.jpg665732Angeli Mentahttps://www.nogalis.com/wp-content/uploads/2013/04/logo-with-slogan-good.pngAngeli Menta2017-11-17 07:58:342019-05-21 15:57:35Locking Down External EMSS
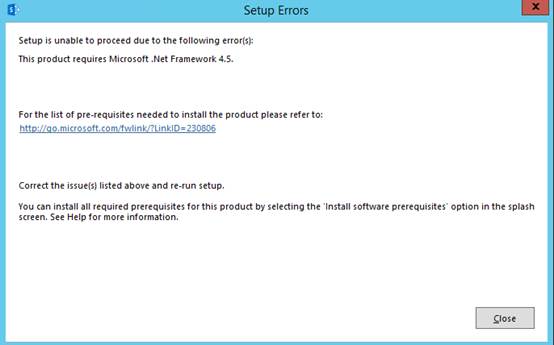
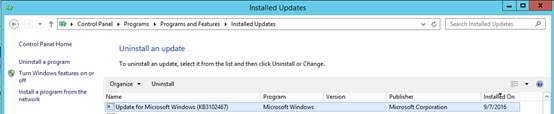
When installing SharePoint Foundation 2013 for Ming.le, you may see an error saying, “This product requires Microsoft .Net Framework 4.5.” After reviewing the installation, you see that .Net 4.5 is already installed. So why does the error appear? This can happen because SharePoint does not recognize a later update to the .Net Framework. As a workaround, you can check to see if updates have been installed through Control Panel – Programs – Programs and Features – Installed Updates. The updates to .Net could be in KB’s 3102467, 3151800, 3102436, or 3045557. Select the KB and uninstall it through the control panel. After removing the update and restarting the server, the SharePoint installation can continue.
https://www.nogalis.com/wp-content/uploads/2017/11/Installing-SharePoint-Foundation-2013-for-Ming.le_.jpg665732Angeli Mentahttps://www.nogalis.com/wp-content/uploads/2013/04/logo-with-slogan-good.pngAngeli Menta2017-11-07 07:37:242019-05-21 15:59:38Installing SharePoint Foundation 2013 for Ming.le
There are several ways to trigger an IPA process, including 4GL triggers and scheduling. One simple and low-overhead method is to use a HTTP(S) call.
HTTP(S) calls can be used to trigger a Process or a Service. To begin, you should have the process uploaded into IPA. Then you should create the Process or the Service Trigger. These can be created in Rich Client or in the IPA Admin web tool, but note that the following instructions use the verbiage & menus in Rich Client.
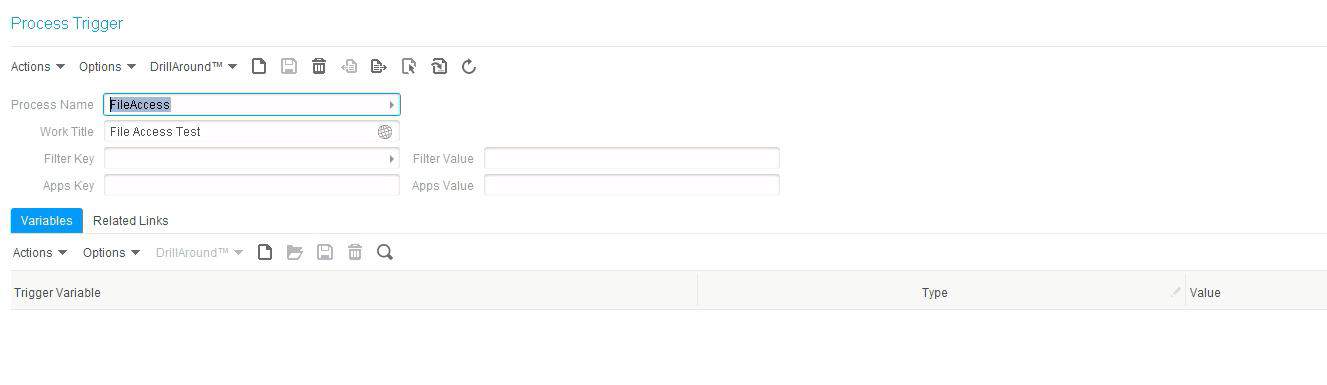
Creating a Process Trigger
In Rich Client, go to Start > Scheduling by Process Definition
Create New
Select the Process under Process Name
Give the trigger a work title
Add variables if your process accepts them
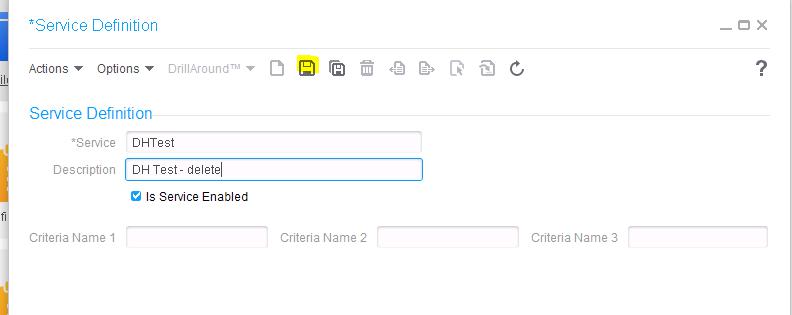
Creating a Service Trigger
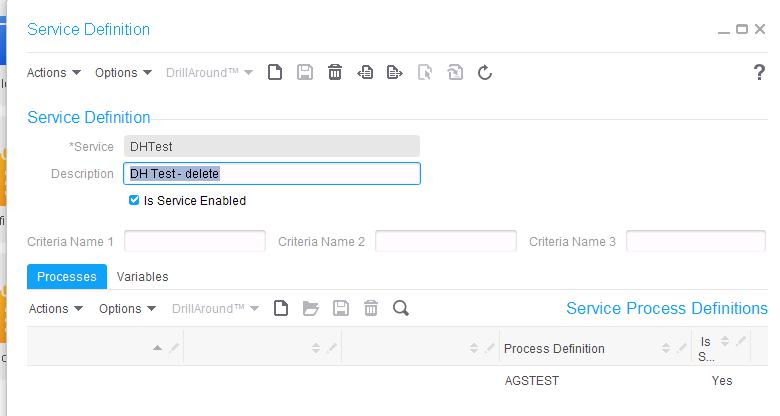
In Rich Client, first create the Service Definition by going to Start > Configuration > Service Definitions
Create New
Give the service a Name and Description
Check the “Is Service Enabled” check box
Click the Save button
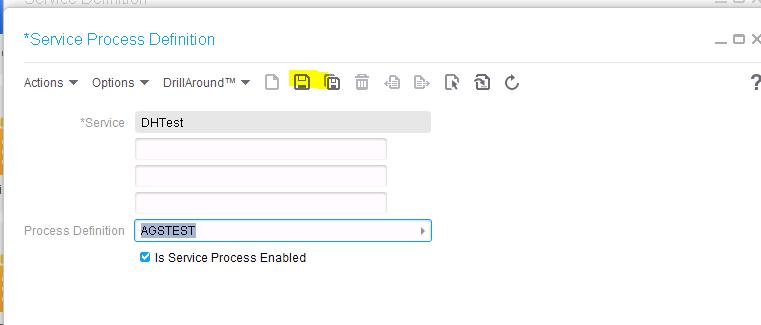
Under the Processes tab, add the process that you will be running with this service (click the add new button)
Select the process to add
Make sure the “Is Service Process Enabled checkbox is checked
Click the save button
Add variables if your process accepts them
URL syntax for calling Process & Service Triggers
Make sure you give your process a work title, in this case we are using Trigger Test
These examples assume two variables: TestVar1 and TestVar2 (variables use a zero-based array)
For a Service Call, triggerName is the service definition name
For a Process Call, triggerName is the process trigger name
Asynchronous Service Call – https://ipahost:port/bpm/trigger?triggerType=ServiceAsync&triggerName=DHTest&dataArea=prod&workTitle=Trigger%20Test&varName\[0\]=TestVar1&varValue\[0\]=xyz&varName\[1\]=TestVar2&varValue\[1\]=123
Synchronous Service Call – https://ipahost:port/bpm/trigger?triggerType=ServiceSync&triggerName=DHTest&dataArea=prod&workTitle=Trigger%20Test&varName\[0\]=TestVar1&varValue\[0\]=xyz&varName\[1\]=TestVar2&varValue\[1\]=123
Asynchronous Process Call – https://ipahost:port/bpm/trigger?triggerType=ProcessAsync&triggerName=FileAccess&dataArea=prod&workTitle=Trigger%20Test&varName\[0\]=TestVar1&varValue\[0\]=xyz&varName\[1\]=TestVar2&varValue\[1\]=123
Synchronous Process Call – https://ipahost:port/bpm/trigger?triggerType=ProcessSync&triggerName=FileAccess&dataArea=prod&workTitle=Trigger%20Test&varName\[0\]=TestVar1&varValue\[0\]=xyz&varName\[1\]=TestVar2&varValue\[1\]=123
https://www.nogalis.com/wp-content/uploads/2017/10/Triggering-IPA-Processes-Using-an-HTTPS-Call.jpg665732Angeli Mentahttps://www.nogalis.com/wp-content/uploads/2013/04/logo-with-slogan-good.pngAngeli Menta2017-10-10 08:26:452017-10-12 11:06:45Triggering IPA Processes Using an HTTP(S) Call