When using IPDesigner to create a .csv file, we ran into four issues with the file output:
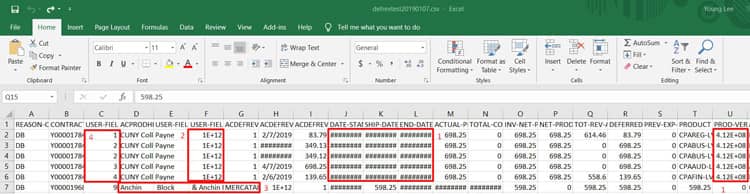
- Problem: Certain dates appear as ######## and certain numbers convert to scientific notation.
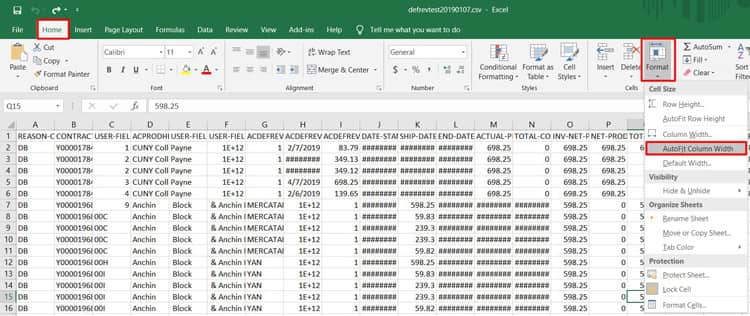
Solution: Select entire page (ctrl + a) and click Home tab -> Format -> AutoFit Column Width

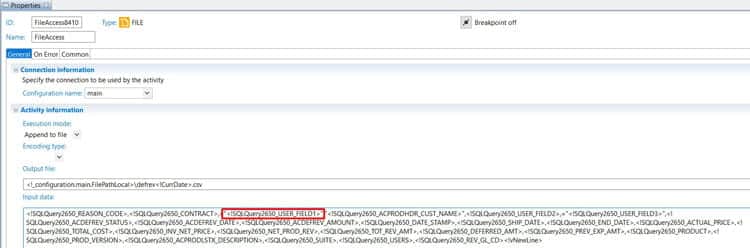
- Problem: Some numbers remain in scientific notation (ex: 1E+12) even after AutoFit Column Width
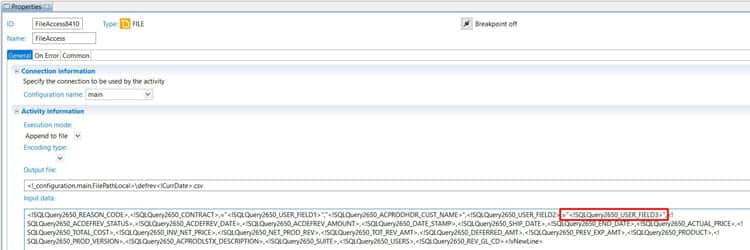
Solution: In the FileAccess node, wrap the SQL query variable with quotation marks and put a “=” before it.
(For example, <!SQLQuery2650_USER_FIELD1> would become =“<!SQLQuery2650_USER_FIELD1>”)

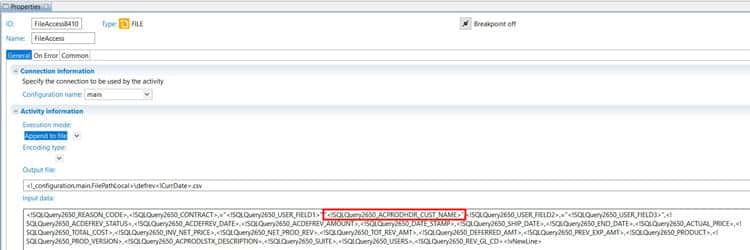
- Problem: Strings with commas get split at the comma in a csv file.
Example in file: The value “Anchin, Block, & Anchin” is getting split into 3 columns as the flow is interpreting the commas as separators.Solution: In the FileAccess node, wrap the SQL query variable with quotation marks to include the commas as part of the string.

- Problem: Certain number values lose their zeroes at the front when written to csv format.
Example in file: The values in column C should be 001, 002, etc. instead of 1,2.Solution: In the FileAccess node, wrap the SQL query variable with quotation marks and put a “=” before it.
(For example, <!SQLQuery2650_USER_FIELD3> would become =“<!SQLQuery2650_USER_FIELD3>”)
Before:

After: