
Searching JXplorer can be cumbersome when you have thousands of Lawson users and possible issues with “rogue” or “orphaned” identities being stored when trying to update identity information.
Below we are going to show how you can easily search for this information vs manually scanning thousands of users.
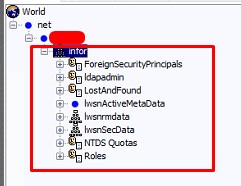
First Select the part of the LDAP tree to search from:
CTRL + F
Notice the “Starting Searching From” field, this search will search all trees below this.
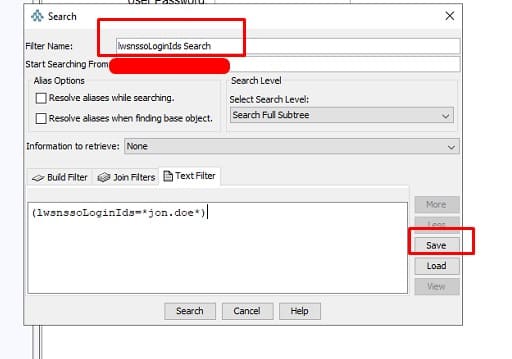
Now go into your Text Filter tab and type in parenthesis the field and value you want, click search
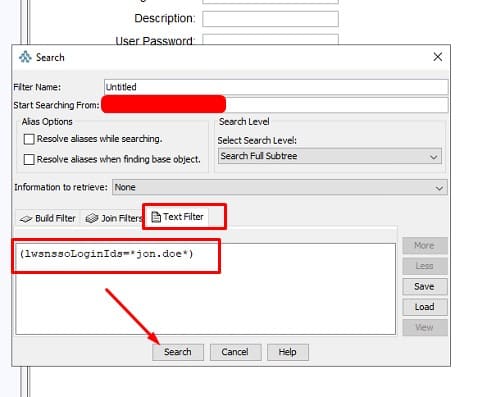
It will automatically switch to the Results field and show your results:
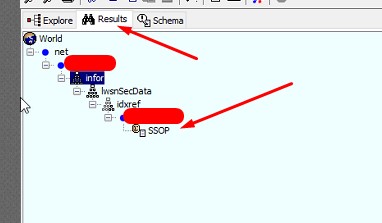
You can then do another search within these results or go back to Explorer tab and CTRL+F again and it will bring your previous search up.
You can also get creative and search multiple fields and values with an “OR” search:
(|(cn=*jon.doe*)(mail=*jon.doe*)(uid=*jon.doe*)(lwsnssoListOfIDs=*jon.doe*))
This is an AND search:
(&(cn=*jon.doe*)(mail=*jon.doe*)(uid=*jon.doe*)(lwsnssoListOfIDs=*jon.doe*))
The | means OR, & means AND. So each field cn, mail, uid etc. have to all bring back a result for it to work. It’s best to use an OR search on average.
Remember, you can also save your searches:
As mentioned above, this is especially useful when finding users in JXplorer to remove any duplicate or “orphaned” RMIDs and Identities not showing up in Lawson Security.
Good luck!
To do a full manual recompile of a Lawson Program, follow these simple steps:
Once the compile is complete, check your program again. That’s all there is to it!
IPA Service definitions can be used to cause or trigger a process to run.
If your site has an event for which work units are delayed or not running for any reason, you can trigger a process to run using the Service Definition in Process Server Administrator.
A process, which is created using Infor Process Designer, routes and tracks the sign-offs that need to occur. In this case, a service, which is delivered with Lawson applications, triggers the launching of the process. It is also possible to create your own service.

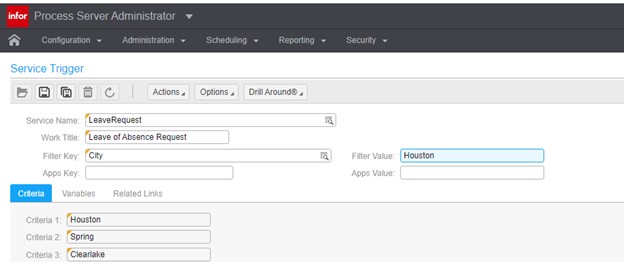
Work Title
Specify a name for the work item.
Filter Key
If filters have been enabled for users and tasks associated with this service, select an option.
Filter Value
If you are using a filter key, specify a filter value.
For example, if you selected City for a Filter Key, then Chicago might be a valid value.
Apps Key
Specify an application key.
Apps Value
Specify a value for the selected apps key.

To trigger a work unit to process, follow these simple steps below:
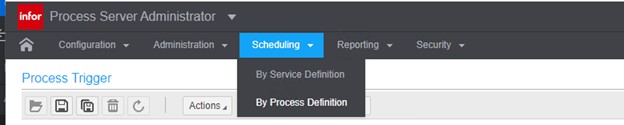
First, you will need to access the Process Server Administrator screen and then select Scheduling > By Process Definition.
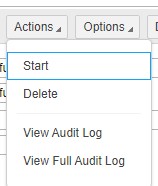
Next, select the process name and double click on it.

Then Select Actions > Start. You should now be able to trigger a work unit to process!

End of mainstream maintenance for SAP Crystal Server 2016 and support plan for SAP Crystal Server 2020
We are on Crystal Server/Reports 2016. Do we need to upgrade to Crystal 2020? I only see the 2016 version on the download site.
Infor BI 10.6.30 for Lawson S3/M3 now supports SAP Crystal Reports Server 2020 as a report’s server. As such, this should be reflected accordingly on the LBI installer. Changes were made on the installer to include CRAS 2020.
CRAS 2020 is backwards compatible with reports created in 32-bit. Users just needs to recreate the data source connections in ODBC to ODBC 64-bit using the same Datasource Name. This also means that users will need to install the 64-bit drivers and configure the settings from 32-bit to 64-bit. For MSSQL, the 64-bit drivers are already available once you already have it installed. For other data source type, download the respective 64-bit driver. Same with Lawson OLEDB, Infor has released a 64-bit version, uninstall OLE DB 32-bit and install the 64-bit version.
Since CRAS2020 is a 64-bit application, the JVMMaxHeap value can now be set more than the 3GB limit in D:\BusinessObjects\SAP BusinessObjects Enterprise XI 4.0\java\CRConfig.xml
Open the CRConfig.xml file. Look for the following lines:
<JVMMaxHeap>64000000</JVMMaxHeap>
<JVMMinHeap>32000000</JVMMinHeap>
Change the JVMMaxHeap value more than the 3GB limit. Save and Restart RAS.
Please note that Crystal Designer 2020 will no longer work when installed in the same server as CRAS 2020. In CRAS 4.3 (CR server 2020), it is not supported to install both server side and client side in the same machine. Registry keys may get corrupted.
If you’re interested in moving forward updating your Crystal software, Nogalis offers MSP support to assist with upgrades and migrations.
If you are having issues loading your externally facing Lawson Portal, one way to troubleshoot is to set the logs to debug mode so that you can hopefully get more information about the errors.
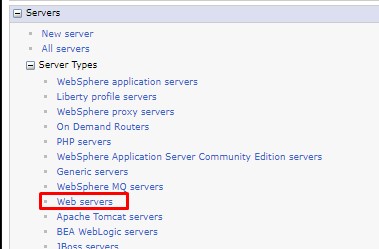
In WebSphere Application Server admin on your internal server, click into the web server under Servers > Server Types > Web servers.
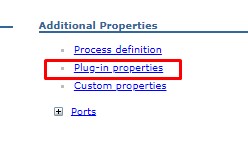
Click the web server name then Click “Plug-in properties”.
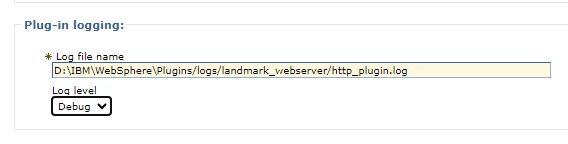
Change the “Plug-in logging” to Log Level “Debug”
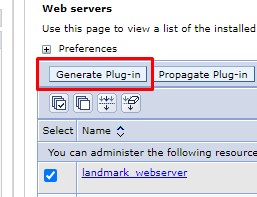
Click “Apply” or “OK”. Go back to the web server list, and select your web server using the checkbox. Select “Generate Plug-in”. Since your web server is external, there is no need to Propagate the plug-ins (this is a manual process).
When you generate the plug-in, the location will be displayed at the top of the screen. Navigate to that location and copy the plugin-cfg.xml file.

Navigate to your external server and paste the plug-in file at <WebSphere Install Directory>/Plugins/config/<webserver name>
Perform an iisreset on the external web server.
Now your web server will be in debug mode, and you will get more detailed information in the plugin logs.

Problem:
You may come across an instance when the MSCM server log for the Picklist scheduler shows the following errors:
“Delta Processing Error: Unparseable date: “##########”
For input string: “####” Record not inserted”
This problem usually means that the shipments are not found on the handhelds – and it’s because of this error causing the missing information.
Resolution:
To simply amend this, you will need to ensure that the Access flag in Lawson Security is set to “Y” when the ‘lawson’ (this is referring to the lawson.username from the mscm.filter.properties file) user has a requester. Once the setting is changed or confirmed, you should not come across this error anymore.
Question:
Is it by design that the Payroll ACH payments are automatically reconciled in PR85 (Bank Account Reconciliation)?
Why are the AP ACH not automatically reconciled in CB80 (Bank Transaction Adjustment)?
Answer:
There is a setting on the payment code that determines if the transactions are automatically reconciled. Inquire on CB00.4 (Bank Transaction Definition) for ACH and click on the Cash Payment button (CB00.7). Set Automatic Reconciliation to “Y”.
Then when you issue an ACH payment it will be automatically reconciled. Payments that already exist in the system will not be affected by this change and will still need to be reconciled.