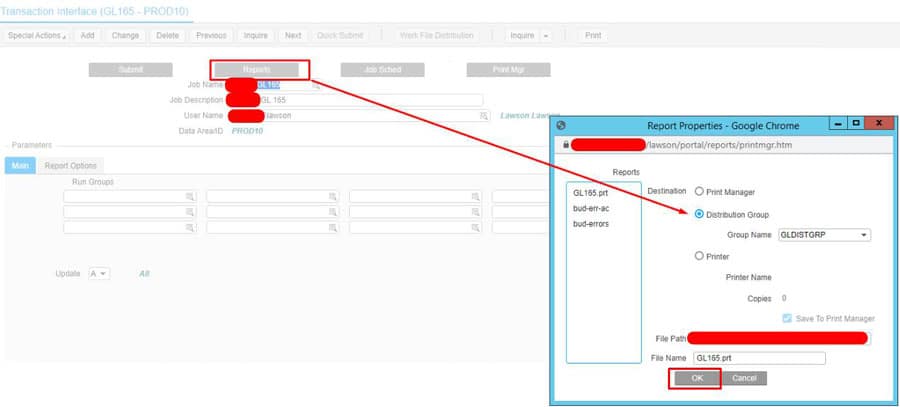
How to set a distribution group to a Lawson job within Lawson portal
Before we get started, you’ll need to have distribution groups setup already. See our article on how to do that if you haven’t. You’ll likely need higher privileged access to perform these tasks.
Assuming you already have distribution groups setup, follow the steps below.
- Login to Lawson portal.
- Go to a Lawson job that you want to set a distribution group for.
- Once the job is created, click on the “Reports” button above the Job Name.
- In Report Properties, select Distribution Group and then select one of your created distribution groups from the Group Name drop down box and press OK when done.
- Click “Change” to save the report properties. Now Inquire on the job and click Reports again to verify the changes were made.
That is, your reports will now show up in the users print manager that are in the selected distribution group. All without having to go to LID.


